
MATTER: Devinci Minus NX Fat Bike Makeover - Hit or Miss?

What you’re about to read concerns an experiment. Not a scientific experiment; an phenomenological one. My ‘results’ of are mostly experiential, not empirical, and the emanate from the main ‘research question’:
Can an aluminum fat bike actually feel good enough to want to ride it a lot?
Yes, there’s an empirical ‘result’ of the changes I made to my Devinci Minus NX: the bike got a LOT lighter. But did the reduced weight matter? It’s not like I could actually compare climb times and extrapolate a $ : speed improvement. And speed while climbing doesn’t necessarily correlate with FUN overall, anyhow. I wasn’t interested in owning a fat bike that was only ‘fun’ because it was crazy expensive, light, and fragile.
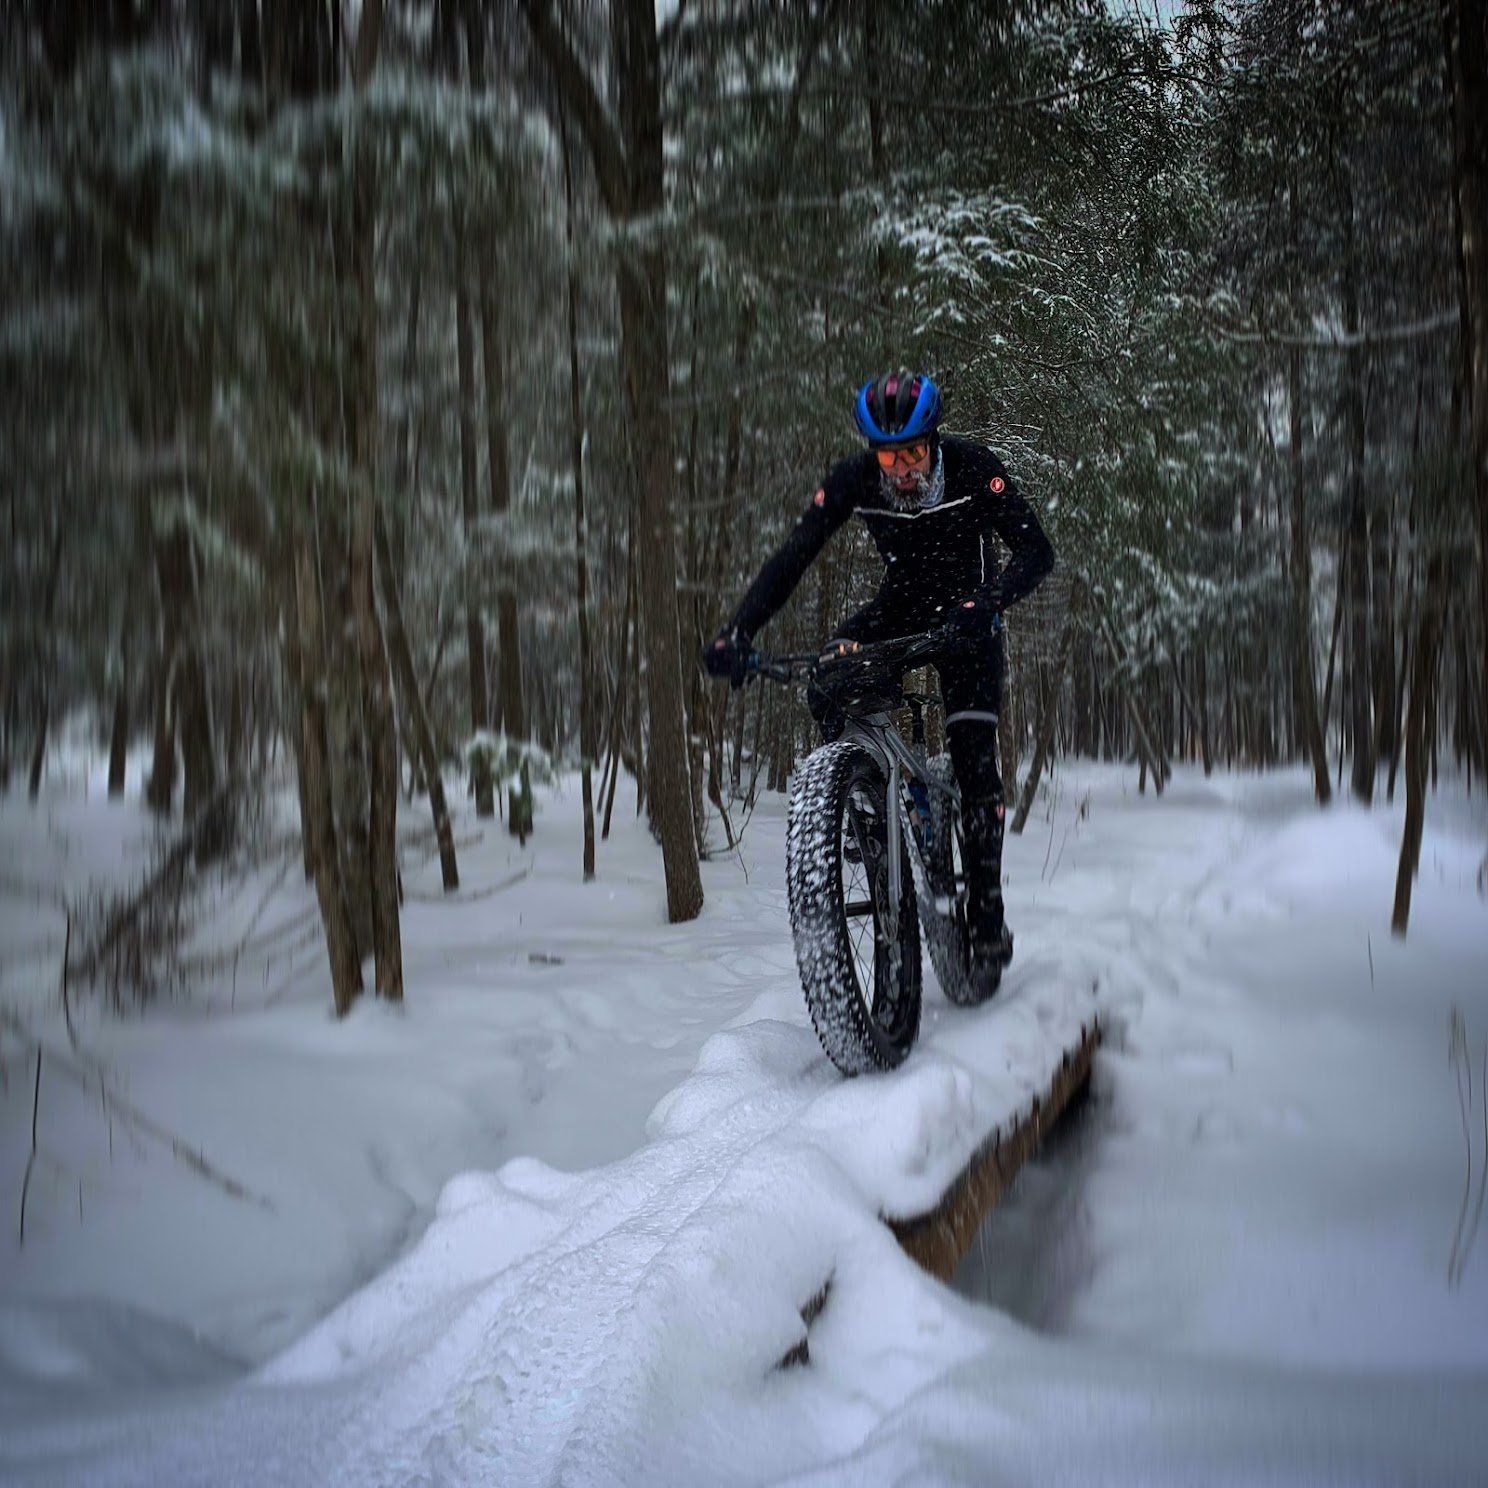
I wanted to achieve sensations on a new fat bike similar to my hardtail MTB: different in degree, not in kind. I want a fat bike to ride like a good MTB overall, with necessary differences associated with snow handling. I don’t want a fat bike that rides like to whole other kind of bike riding. For example, contrast a fixed-gear track bike to a cyclocross bike. They can both ride on pavement, but the track bike CAN’T bunny-hop a curb in a panic situation unless the rider is some sort of ninja. A track bike doesn’t do that. I don’t want my fat bike to ‘not-do’ anything my MTB does. Again, bunny-hopping - a fallen tree in this case. A fat bike better do that, and well, or else it sucks, in my mind. The reason for wanting to ride a fat bike in the winter for me is that it’s FUN. It’s not for training. If training was my driver and priority, I could slog around on whatever.
Would I get to the result/experience I wanted with an off-the-shelf fat bike, or would I have to modify the bike a lot to get there? Which mods would matter, which wouldn’t?
Backstory
I built a Surly Pugsley fat bike from a mix of museum and tractor-grade parts sometime around 2011. The bike made riding trails in winter possible, which was novel and fun. Most of the guys I rode with had the same bike, so our experience was shared. In short order, however, the arms race began. Tank-like Pugsleys were replaced with 9-ZERO-7 aluminum bikes with alloy, then carbon forks. Rims we drilled out ourselves were replaced by those made lighter in the first place. Tires expanded beyond 3.8 to 4” and beyond. While my bike remained the same, most of the other guys’ bikes became a lot more effective for riding off-road, and as yet more of my friends came into the fray, stock bikes were better and better. Riding with the group shifted from fun to frustrating, as I didn’t have enough tire float to control the bike, and even when grip was good I had to ride incredibly hard to keep up with some of the guys at their ‘normal’ pace. Tubeless tires were obviously making a huge difference, and I didn’t have that. A few years in, I wasn’t impressed by stock options on the market I could perhaps upgrade to, I was getting in lots of good snirt rides, and the novelty of fat bike riding had worn off. I eventually just didn’t bother fat biking much; it wasn’t worth it.
Things changed as the pandemic set in. A great trail network became actually accessible to get to from my house without riding a lot of pavement (salty); I don’t have a car. With all the users out, conditions were becoming more and more consistent. And bike companies were starting to implement ‘modern MTB’ geometry into their fat bikes. I began to think the time was coming to get a new bike. The fact that my friend, Iain Radford, had been skipping snirt rides with me to ride his fat bike for years suggested that it really had to actually be fun on a proper bike; we have the same idea of what a good day on a bike is. The time seemed to be right to jump back in.
But which bike?
With more than a year experience on my Trek Stache hardtail MTB, which has fairly ‘modern’ geometry, I was confident I could identify a fat bike geometry I wouldn’t be disappointed in. With supply chains in tatters, it was a small miracle that anything in my price range ($2k - 2.5k) was actually available in the size I wanted, XL (for reference, I’m 6’1”, have a long reach for my height, and ride an XL Trek Stache). One morning in fall I messaged my friend, Benoit Simard, to ask that he let me know if any XL used bikes came into view, and he immediately informed me that an XL Devinci Minus NX had just arrived at his shop, Espresso Sports, and it wasn’t pre-sold! I happily committed to buy the bike and come get it asap.
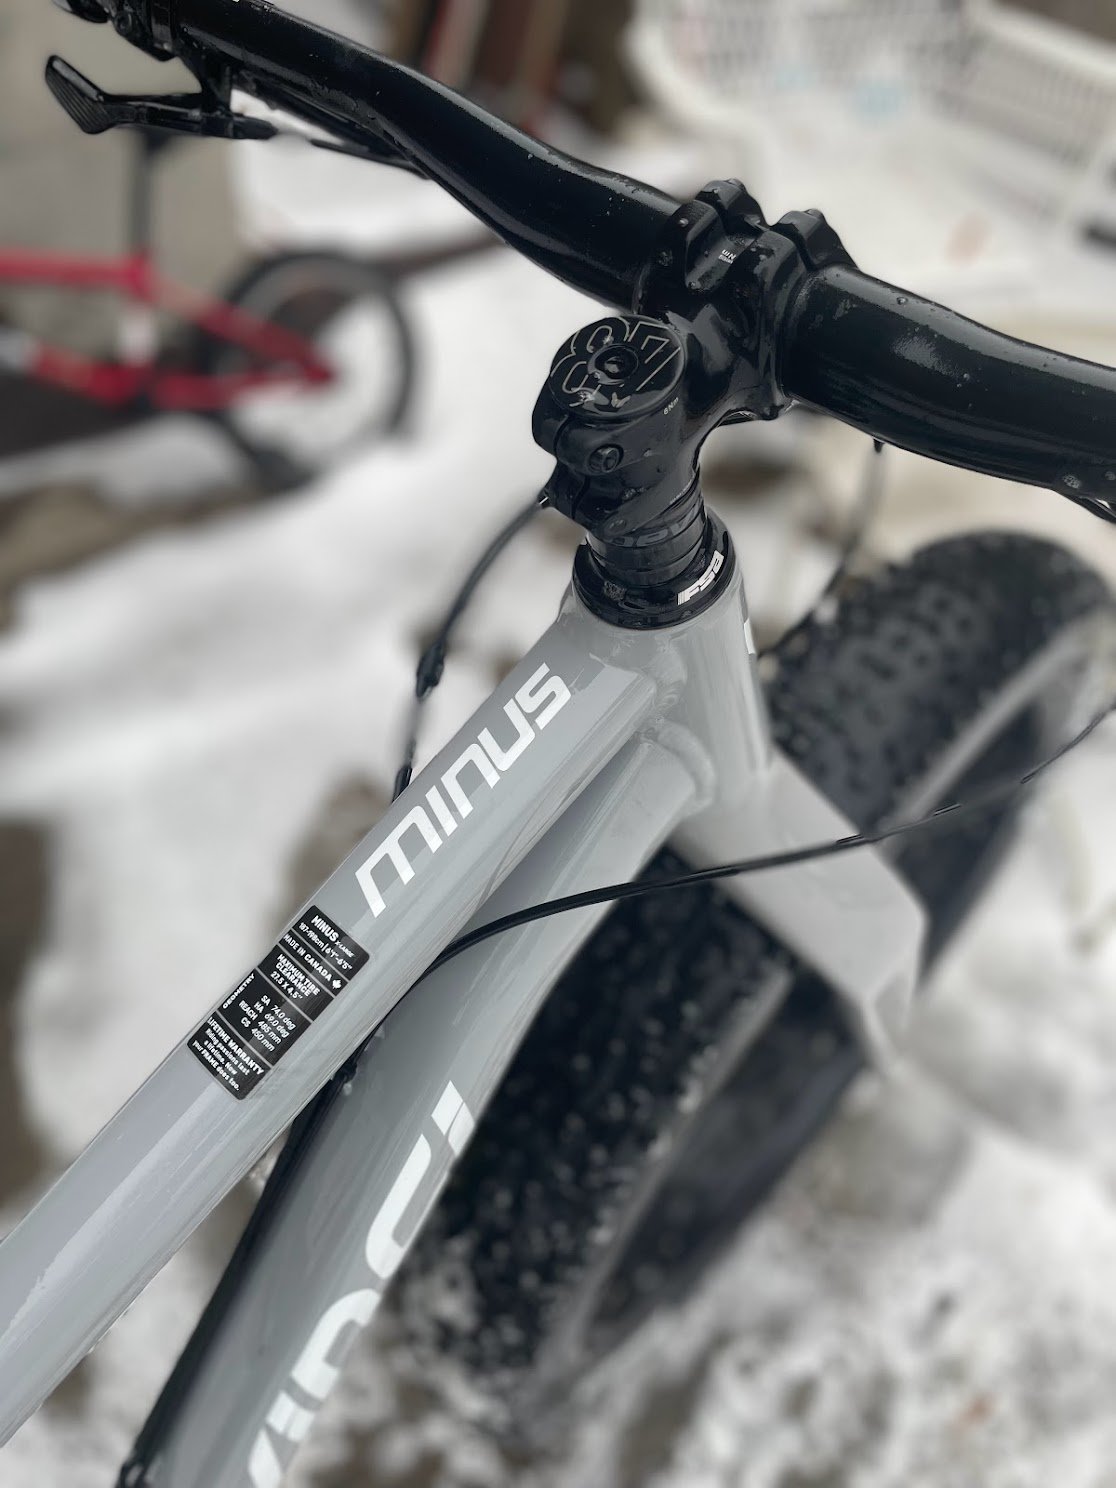
Devinci manufactures the Minus frame in Chicoutimi, Quebec. My understanding is that Devinci sources their aluminum from Rio Tinto, formerly Alcan. Rio Tinto and Alcoa smelt aluminum in 10 locations across Canada, and Rio Tinto is actively developing an innovative process to fully electrify and generate zero GHG emissions from aluminum smelting. Formerly powered by coal incineration, this is a big step forward, enabled by Quebec’s hydro-electric grid. It’s really heartening to see us finally see sustainable development permeate bicycle manufacturing.
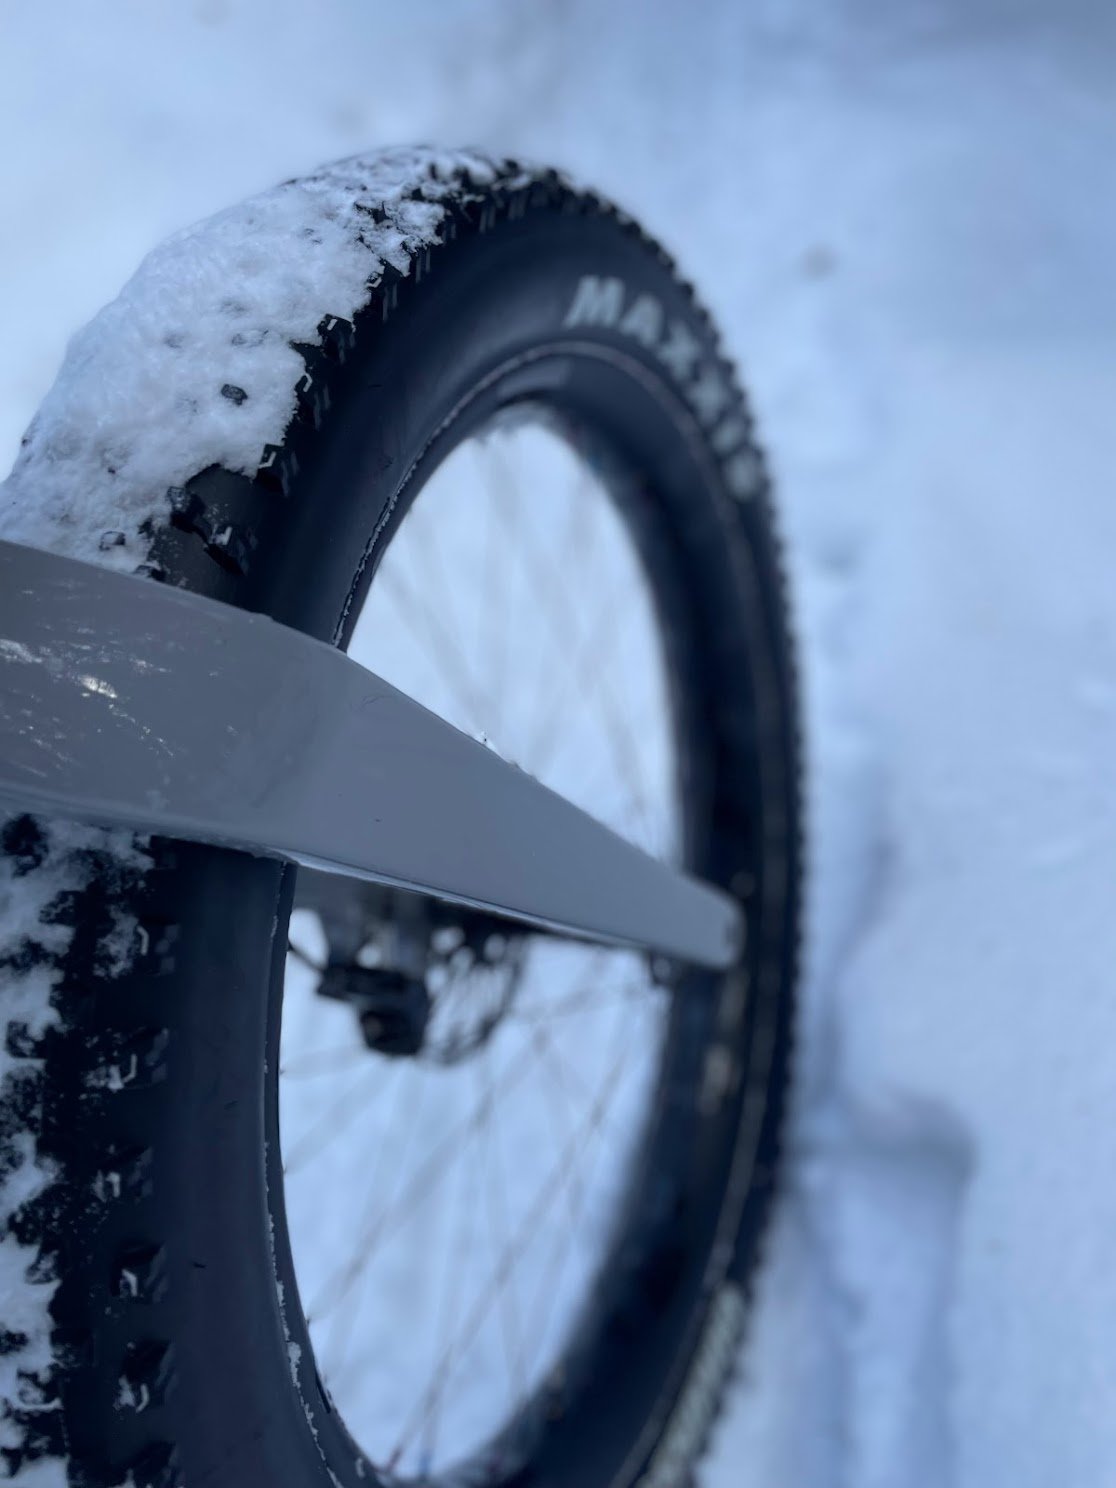
Canadian-made, one might ask, ‘Is the bike a good deal?’ At $2699, in the context of bikes falling well above $10k all over the place, the Minus seems somehow totally reasonable. It’s almost ‘irrelevant’ while bikes are in such short supply. Highlights to the bike’s build are its full-carbon fork, SRAM Level T hydtraulic disc brakes with 1800mm rotors, and dropper seat-post. If there’s one ‘miss’ on the bike, I’d say it’s the 27.5 Maxxis Colossos tires, which I equate to ‘hybrid’ tires. These might have been specified due to price or availability constraints; they are the one component of the bike that is out of line with its intended use.
Experimental Design
Over the months that followed, to the moment I write this, I’ve covered 876km on the Minus, which translates to somewhere between 60-80 hours. I rode the bike in stock form for a few hours in the Laurentians the day I picked it up with my buddy, Scott, then went through a process of upgrading the bike to meet my requirements. My approach has been driven a few key priorities, all of which are required to manifest FUN:
Warmth: metal in contact with hands is cold. I wanted to increase warmth as much as possible.
Fit: I wanted to position myself with a bias toward singletrack performance.
Effectiveness and efficiency: grip is paramount, which is intertwined with rolling resistance. I wanted to achieve a lively feel to the bike, and to be able to climb the steepest climbs anyone else in my group could make.
Weight: I wanted to drop the bike’s overall weight as much practicable, to help translate energy input into speed, and to make it easier to push up steep climbs (and my basement stairs!).
Here’s what I did, and how each change has or hasn’t affected my experience on the bike. I’ll also cover the measures I took to ensure the bike was properly assembled ‘out of the box,’ to protect it from the ravages of salt exposure.
First Impressions
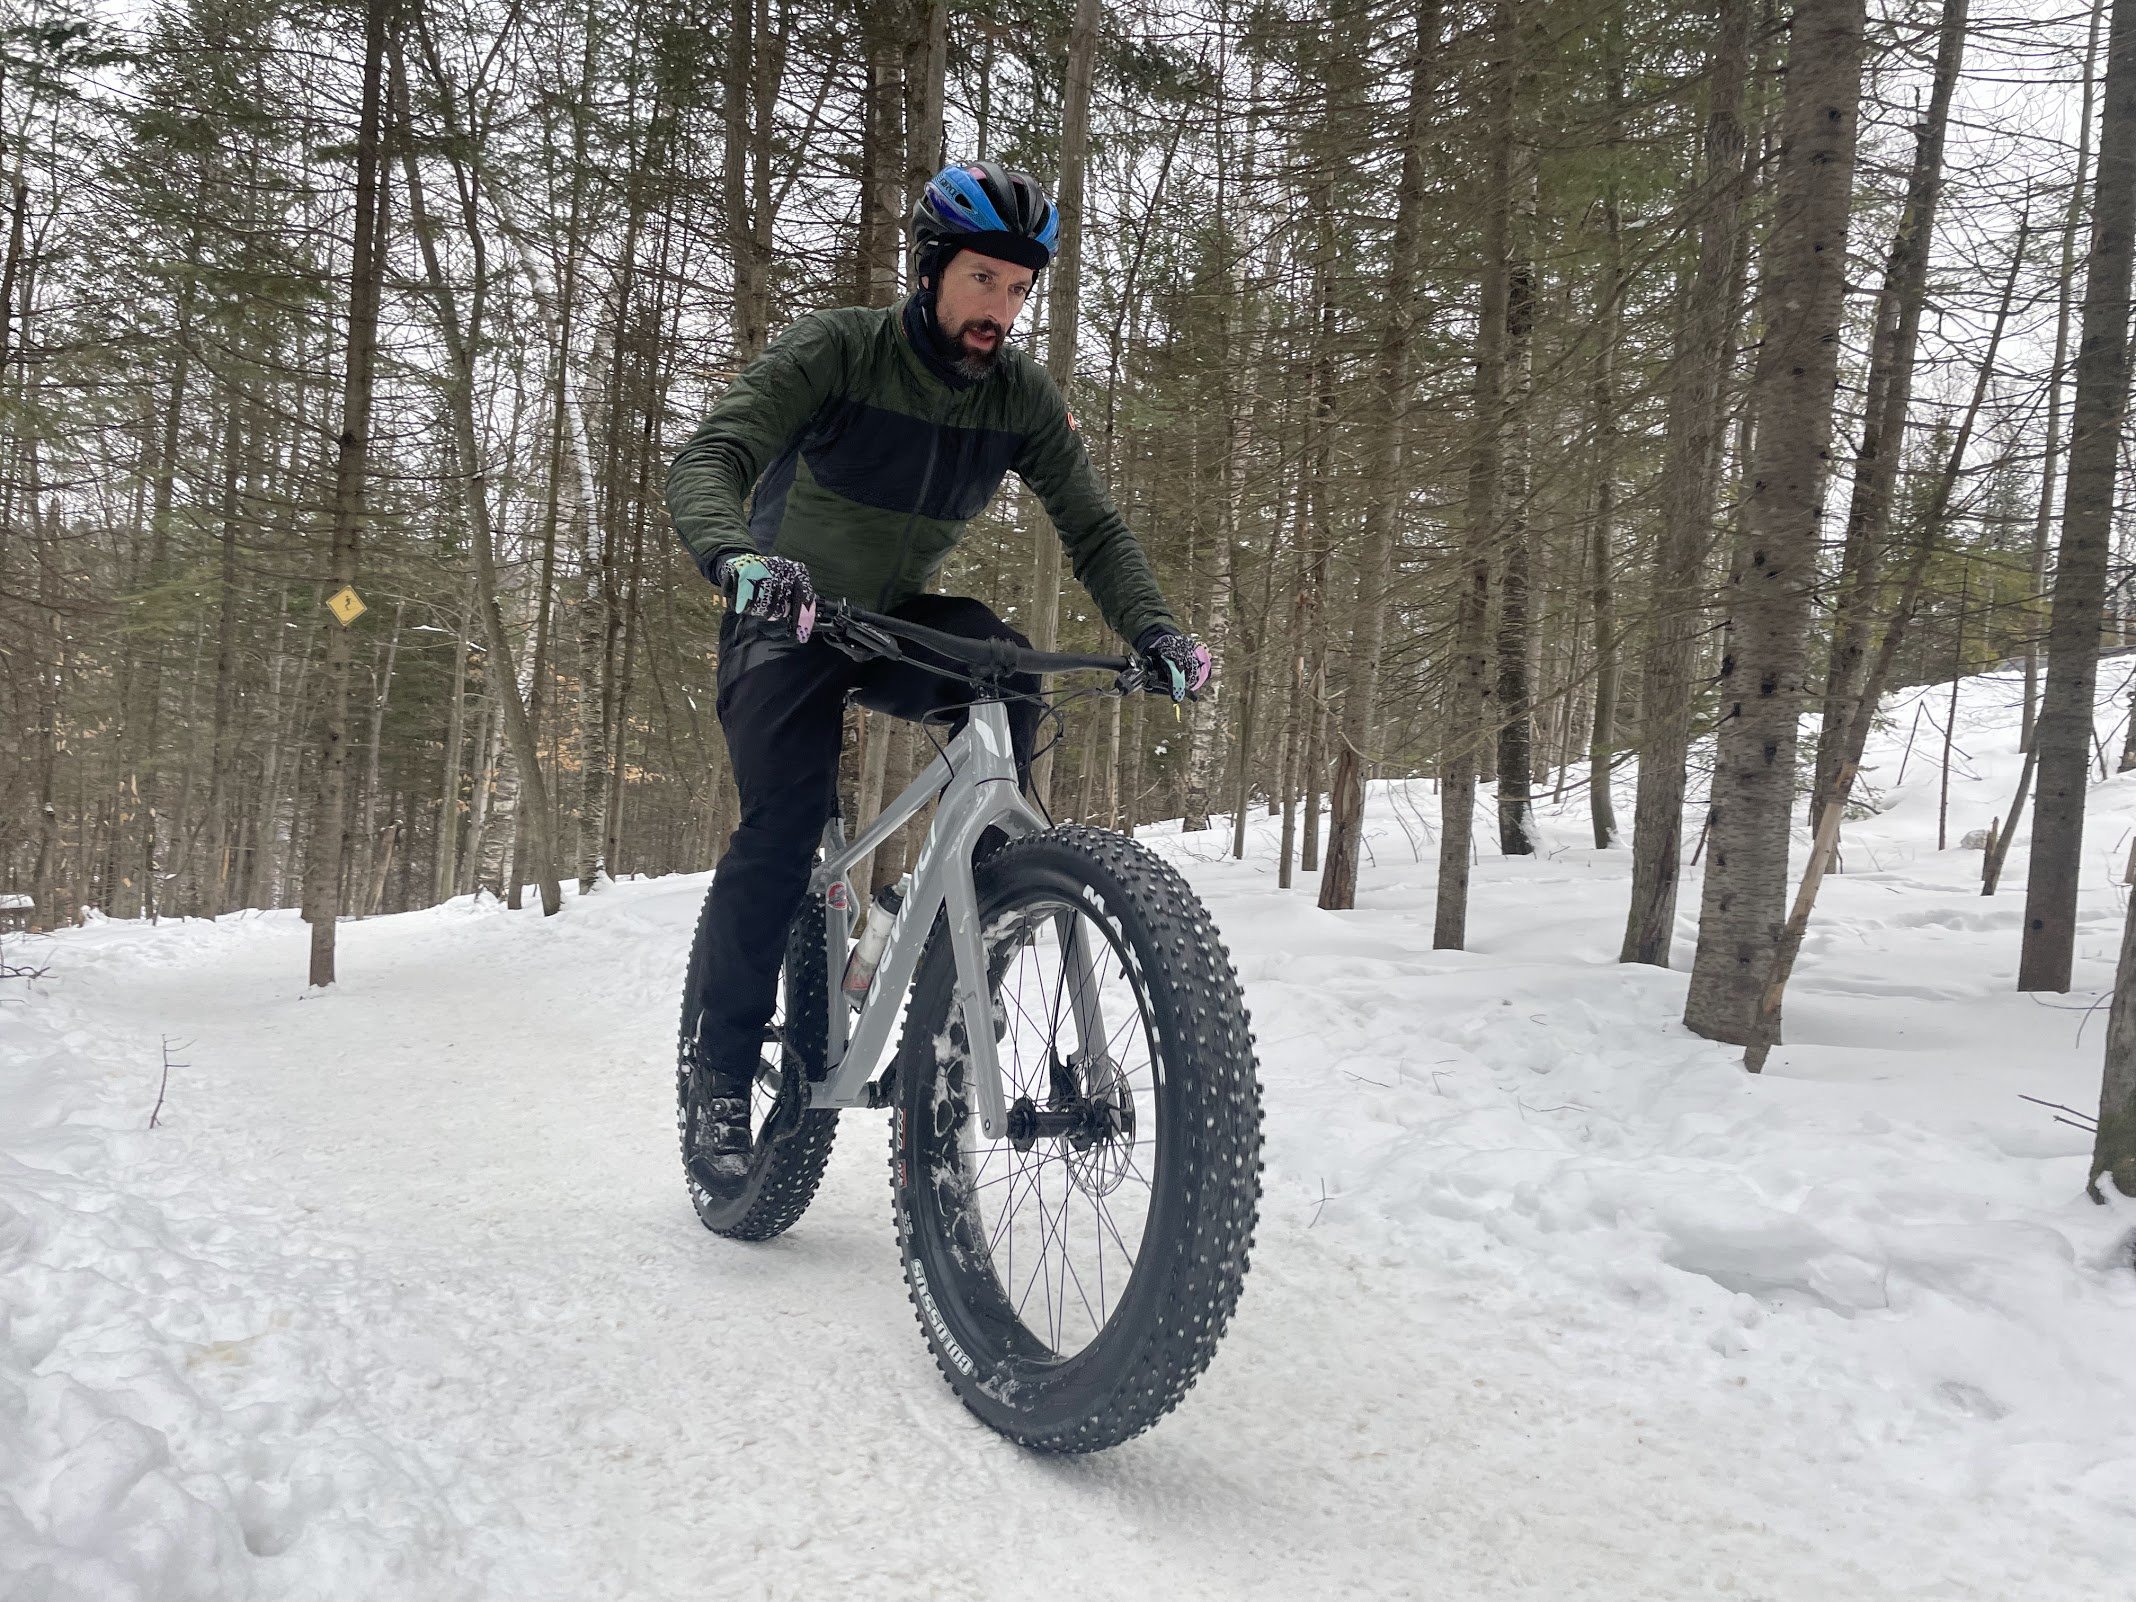
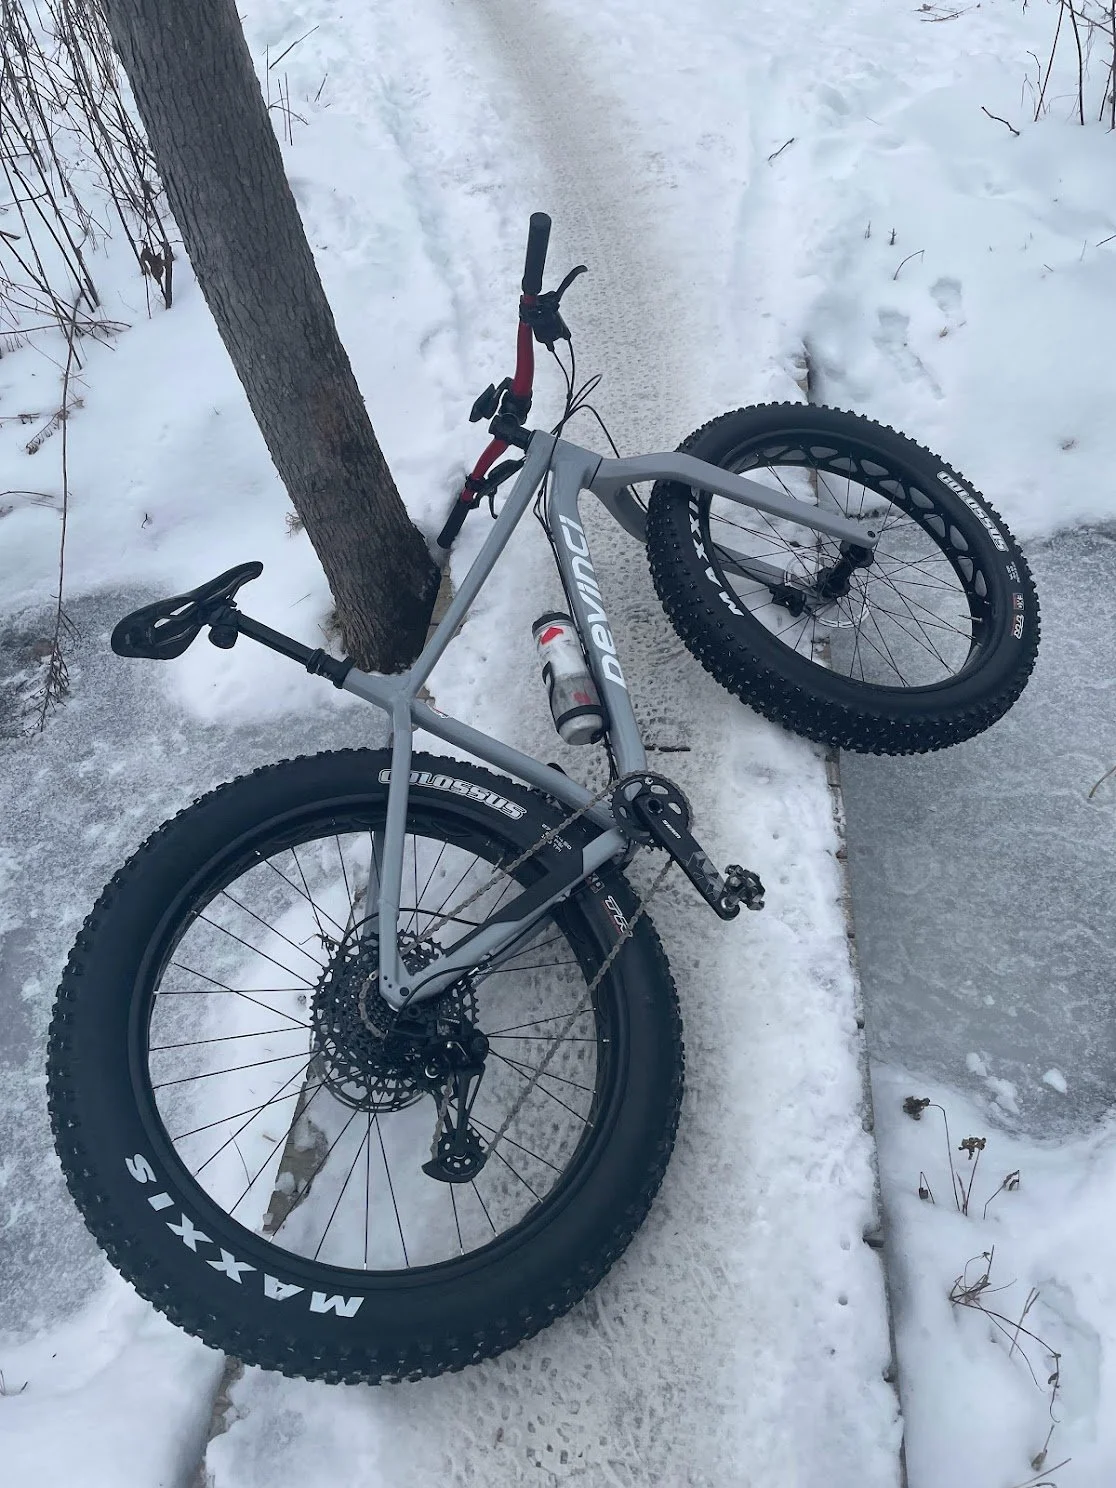
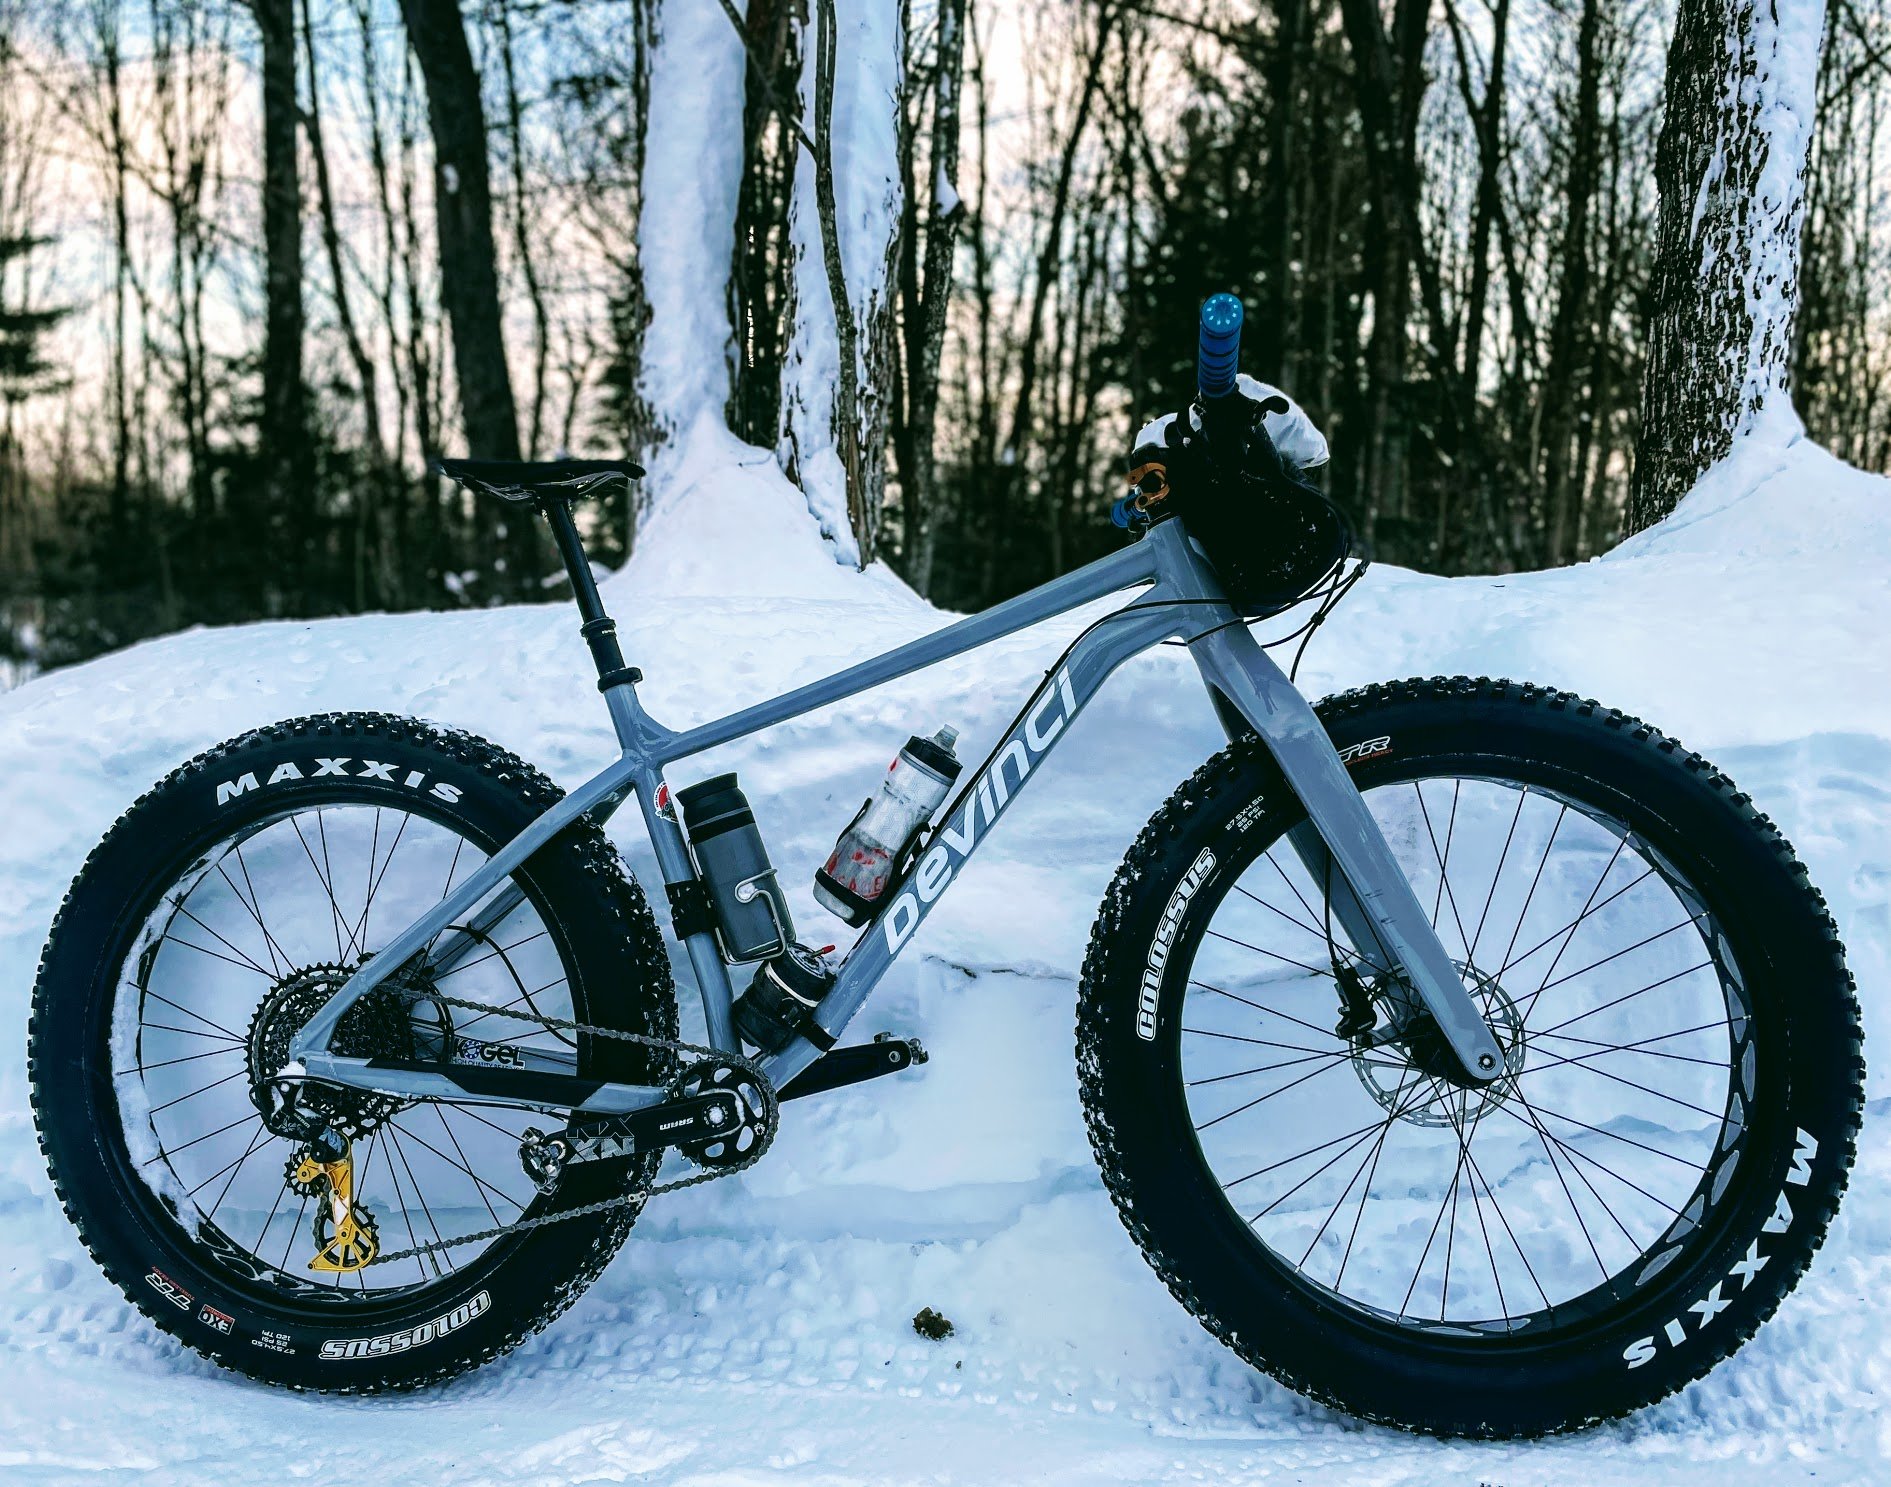
My first day on the Minus was spent on trails in Morin Heights and Mont Loup Garou. First impressions were good, and I liked the bike’s geometry right away. The bike’s dropper post was slammed down as low as possible, but still felt a little high when extended fully. The bars were wider than I’d ever ridden - 780mm - but this didn’t pose a problem. I rode the tires at too high a pressure too long, and the bike’s grip improved significantly once I dropped to about 6 PSI. It always takes time to get to know how new tires react. The bike wasn’t ‘responsive’ at all, but it was stable. I failed to weigh it, but based on the measurement I did before changing wheels, I’d put it at about 36 pounds without pedals. Wow, right? What would it take to drop that down under 30?


Tear-down and Immediate Mods
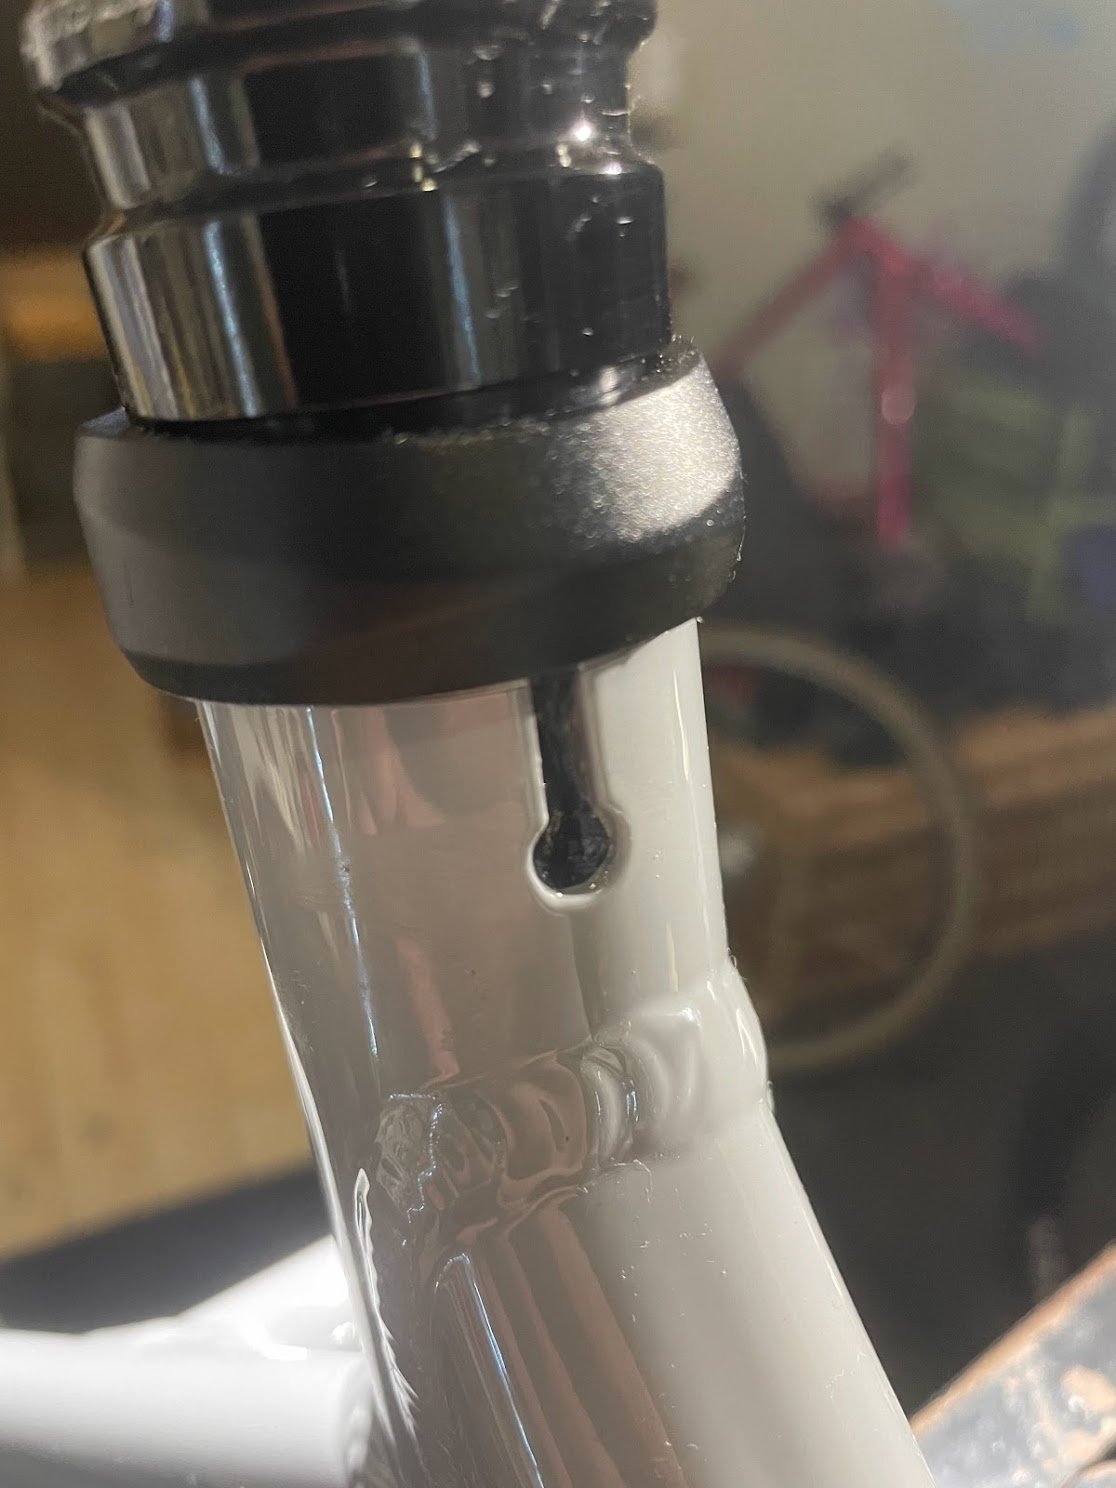
Once back home with the bike, I swapped a few parts and got into a bit of a tear-down to prepare it for salt exposure. This didn’t include greasing bottle cage bolts on the seat-tube, because there aren’t any. C’mon, guys, what are you doing to me here? I know bottles freeze and all, but there are ways around that. Two cage mounts are better than one. I mounted a Specialized thermoplastic cage with Kogel’s titanium bolts. Zing!
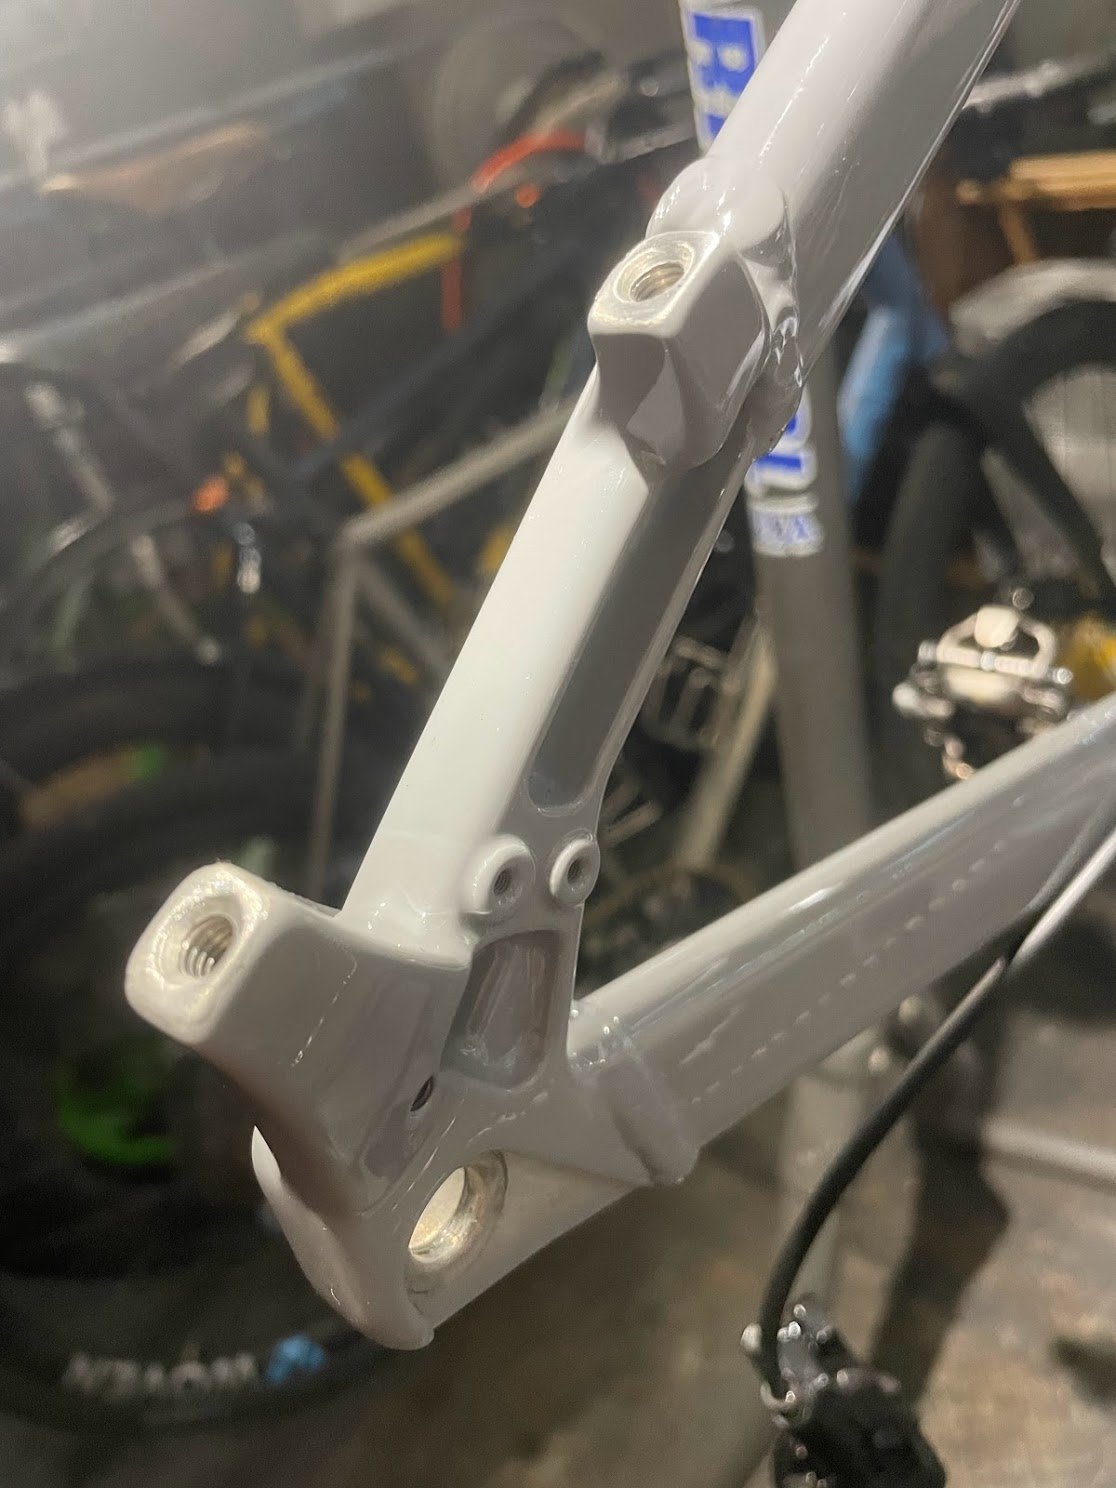
I removed all frame hardware, and added either Kogel water-proof grease or thread-lock compound. I also added silicone to areas that could allow water in, like the front of my seat-post and vent holes on the frame. Ample grease went in between derailleur hanger and frame, and into headset bearings (which were installed with grease - I added more). I didn’t pull the bottom bracket out, but will do at the end of the winter. It’s threaded - THANK YOU, DEVINCI! - so this will be a simple job. Hardware for components all came off, and was greased.
Seating
Devinci was wise to spec a dropper post on the Minus. Beyond the obvious - allowing the rider to bring their centre of mass down without also bringing it back - droppers make remounting the bike on narrow trails with soft sides a lot easier. You can drop it down, swing your leg over easily, and get rolling without struggling to get your balance as your wheels slips. The stock post, from Trans-X, is nice enough, and long-travel at about 170mm. That’s more than I need, and put my saddle too high, so I swapped to my Race Face Turbine R 125mm unit, which is lighter - mostly because it’s shorter. This allowed me to use my preferred saddle, already mounted: a San Marco Shortfit Narrow. The stock lever is probably from Trans-X too, and while I wouldn’t call it ‘crap,’ it’s not ‘good’. The lever’s leverage is poor, especially compared to the One-Up lever I use on my Trek. When hands are cold, levers matter a LOT, and I often struggle with this one. For winter 2022-23 I’ll pull the One-Up off my other bike.


Handlebars and Stem
It’s nice to drop weight by swapping from alloy handlebars to carbon., but that’s never been my priority. For winter riding, the primary benefit to carbon is warmth. Carbon doesn’t function as a heat-sink; it’s as simple as that. My objective for the fat bike is to eliminate as much metal my hands touch as possible. Bars come first, then there’s brake levers, grips, shift levers, and the dropper lever.
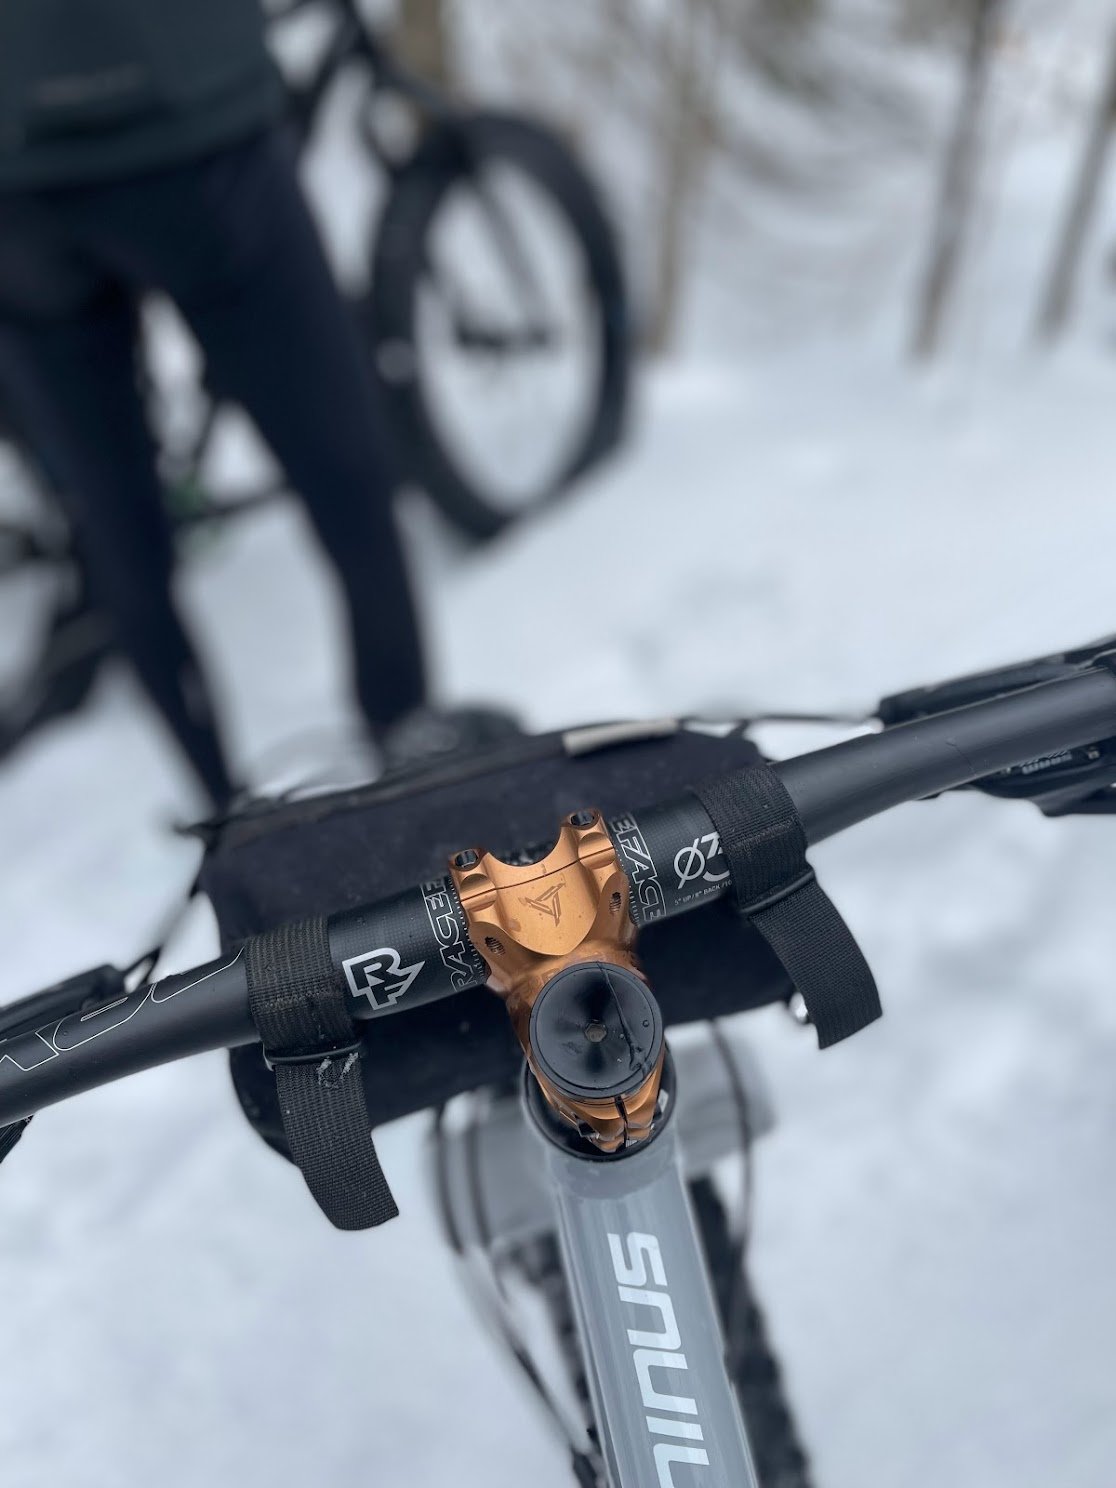
My stock bar was a 780mm OEM alloy unit with a nice shape. With the stock lock-on grips I was able to position brake and shift levers where I wanted, and the same for my dropper lever. The stem was a 50mm OEM unit, also alloy, to accommodate the 35mm bar. I had a Chromag carbon bar and Race Face stem around to use, albeit short: 720mm. These bars taper away from the centre pretty far, which limits the inboard placement of levers. In the photo above, my levers are as far inboard as possible. To achieve the reach to levers I want and need, I had to slide my lock-on grips outboard, beyond the end of the bars. This took me close to my desired bar width of 760mm, but also wound up resulting in both grips broken from striking the ground during rides. You now, bails off the trail! These bars were not workable; I needed longer ones that would allow me to position everything where it needed to be.
I chose to try a bar on the very light end of the spectrum, which is marketed as ‘comfortable.’ Cool, without suspension, this is what I want! The Race Face Next SL is 740mm long, 35mm in the centre, and not crazy expensive; about $220 CAN retail. I ordered the bar along with their Turbine R35 stem in 50mm, which is a beautiful piece of machining. This retails for $135 CAN.
As hoped, the bar easily accommodates the placement of levers I want for one-finger braking and good access to my thumb-levers. As you can see above, I mounted a pair of end-plugs pilfered from my son’s spare scooter parts, to buy a little extra width and bar protection. In practice, these just wound up getting caught on trees through tight turns, and I lost one on the first ride. Bummer! I swapped to regular plastic plugs, smacked a tree - but didn’t crash! - two rides later, and cracked the front of the bar at the end. BUMMER! This isn’t really a structural area, so I’m monitoring it and will work out some sort of reinforcement for next winter. Hitting trees with my bars is pretty common, so I’m ok with the 740mm width for winter. I like the feel of the bar - but would have to ride it back to back against others to substantiate any comfort claims - but reserve judgement regarding whether the thin ends are suited to the trail riding I do. Snowshoed trails like ours are tighter around trees than machine-groomed trails.
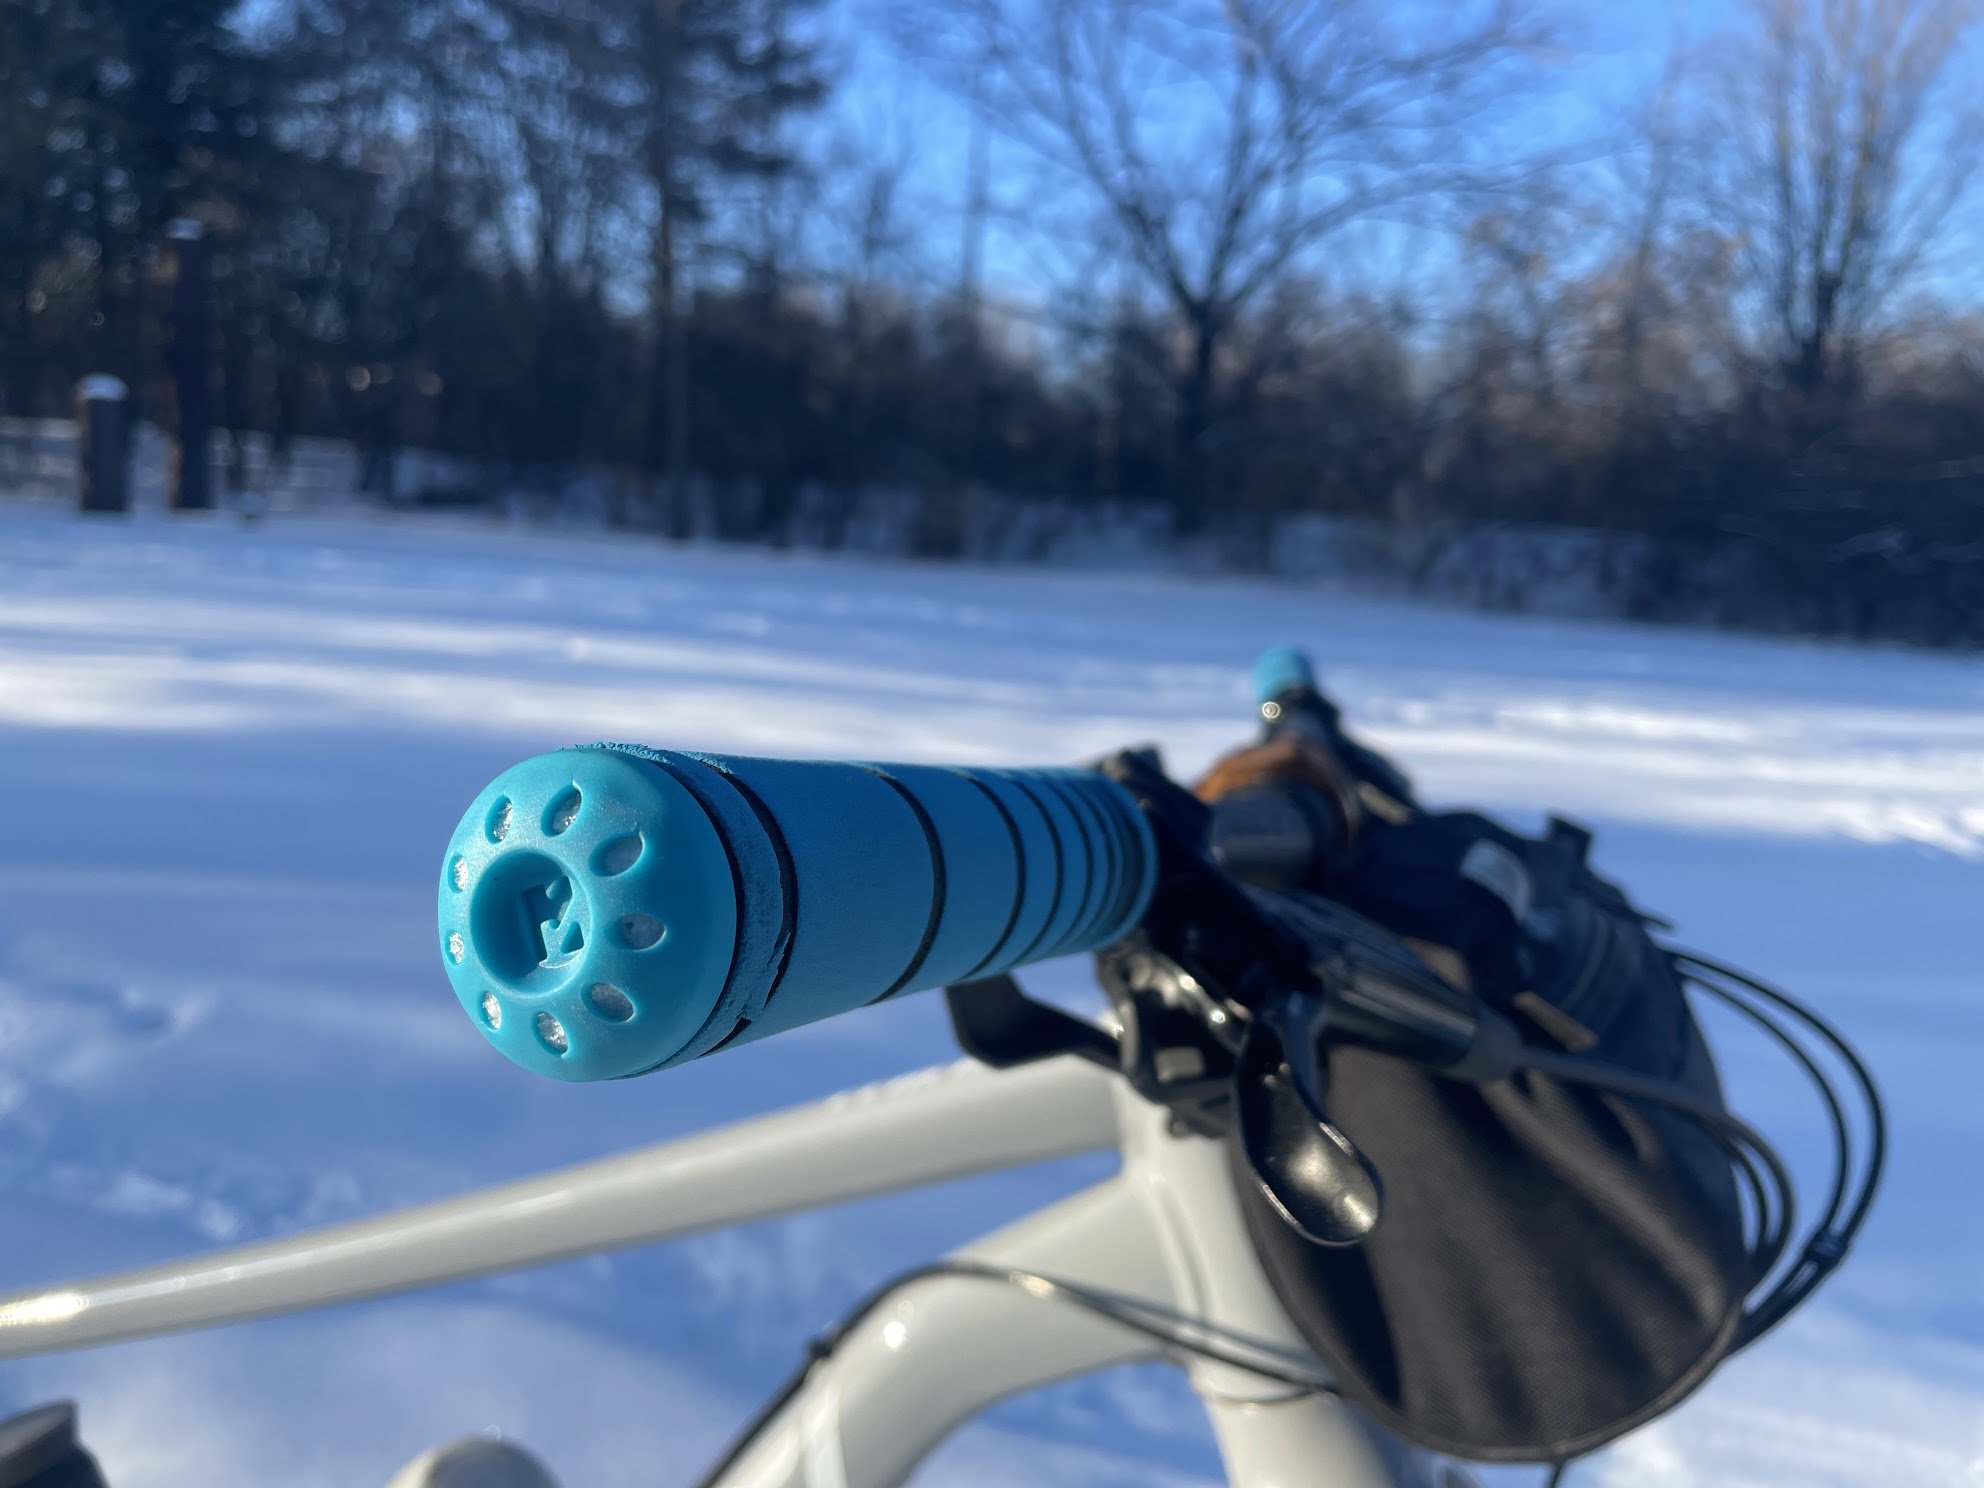
The Turbine Stem does what proper stems do, and looks good while doing these things. More importantly, swapping away from the stock lock-on grips with alloy clamps on their inside edges removed a bit more metal contact. I took the silicane Absolute Black grips off my Trek Stache and they’ve been great. These grips work really well for me through every season, and don’t have an issue with rotating on the bars. They are also light, which is nice, and totally metal-free. They are durable too! at $35, they are a good value, IMO.
I tried a pair of neoprene bar-mitts for a ride, to see whether I’d like them. I don’t, I hate them. Bar mitts are polarizing, and I’m comfortable saying that for me, if it’s so cold I can’t ride without them I don’t want to ride outside. I prefer spending my time on singletrack, which doesn’t feel remotely ‘right’ with bar mitts. I do hand-slings off trees multiple times each ride, and want a nimble feel. I get it, other people use and love them, but I’ve been able to ride down around -18C without them on trails, and that’s cold enough for me. For trekking and stuff, I get it, but that’s not how I want to ride fat bikes. Different strokes for different folks.
Still in the handlebar area, I ran my Garmin 520+ for a while, but its battery is so limited in the cold I stopped, and switched to using my Forerunner 235 watch. Protected by my jacket, it easily lasts the 5-6 hours my longer rides last.
Drivetrain
My Minus is the SRAM NX Eagle model, which runs their all-steel cassette, steel X-Sync 2 chainring, and NX 12-speed shifter and derailleur. The derailleur is floppy ‘out of the box,’ which is consistent with all ‘entry-level’ rear derailleurs. The cage is stamped steel, and the pulleys are plastic with bushings instead of bearings. The shifter feels fine; it’s always harder to tell where the compromises lie with shifters. The cassette has a cheap look to it, and sort of a ‘dull’ or ‘muted’ feel to its shifting, but performed fairly well. Up front, the ring holds the chain well and without drops. Speaking of the chain, it’s a weak-looking unit. Ask me to describe what I mean and all I can say is that the steel looks low-quality. I broke it and realized I’d not even considered acquiring a 12sp master-link to carry as spare. I used the 11sp link I had, which worked fine and never posed an issue.
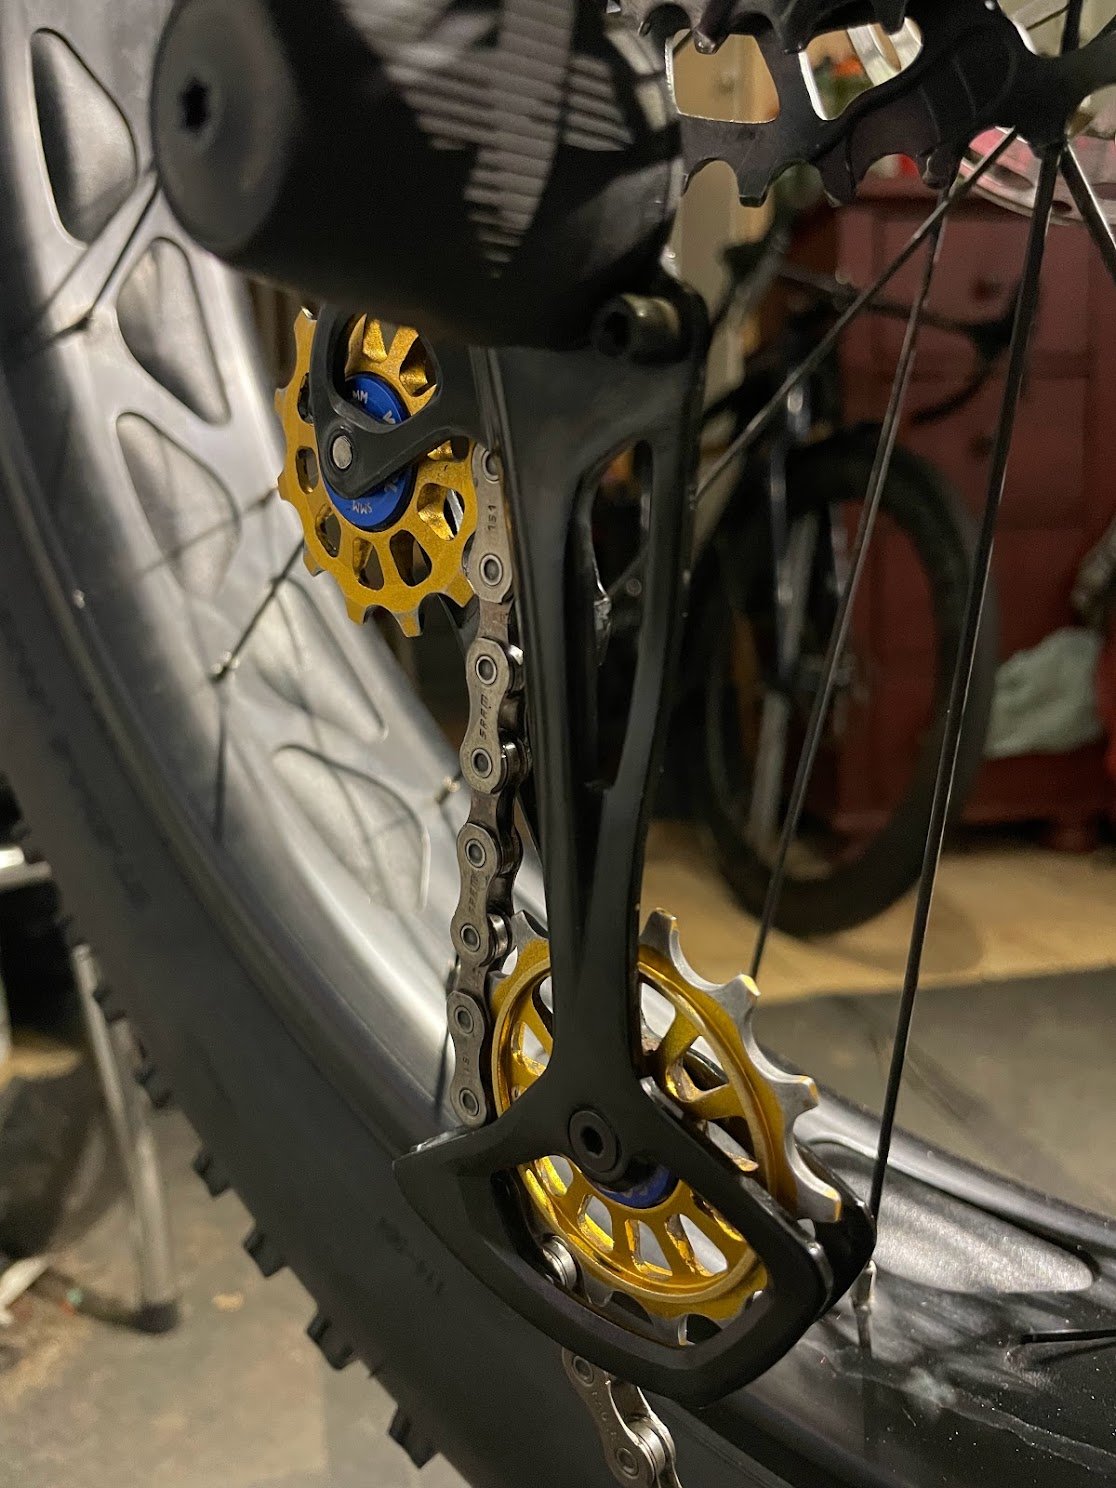
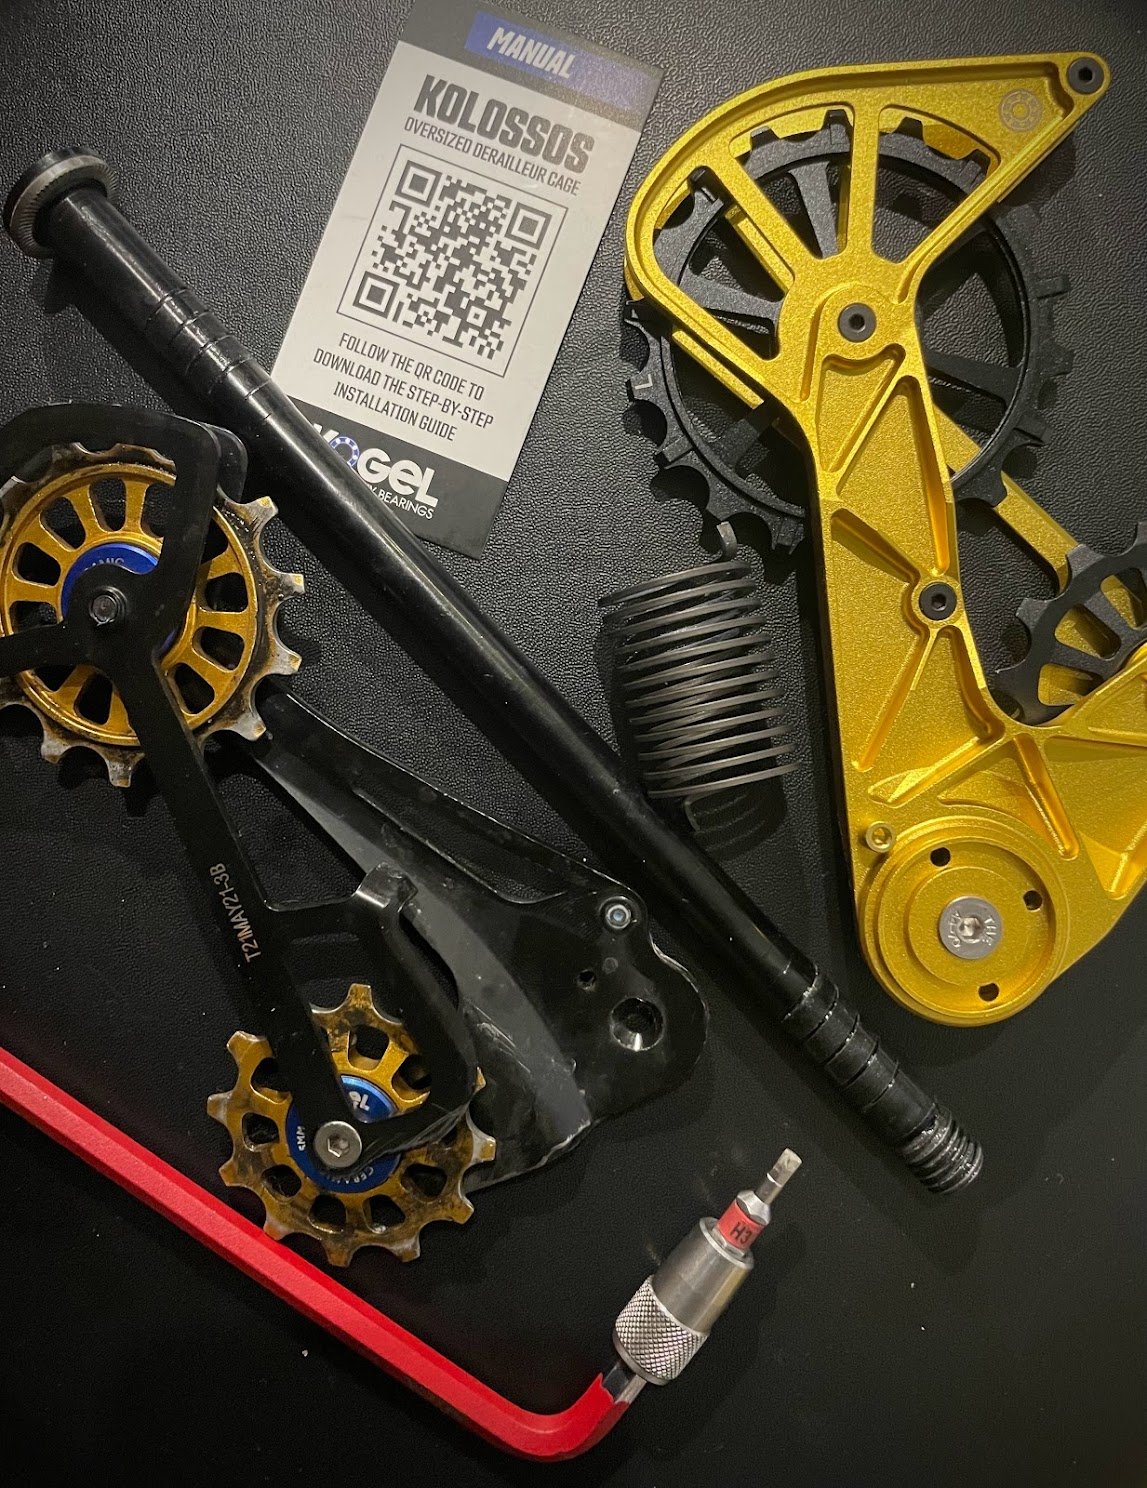
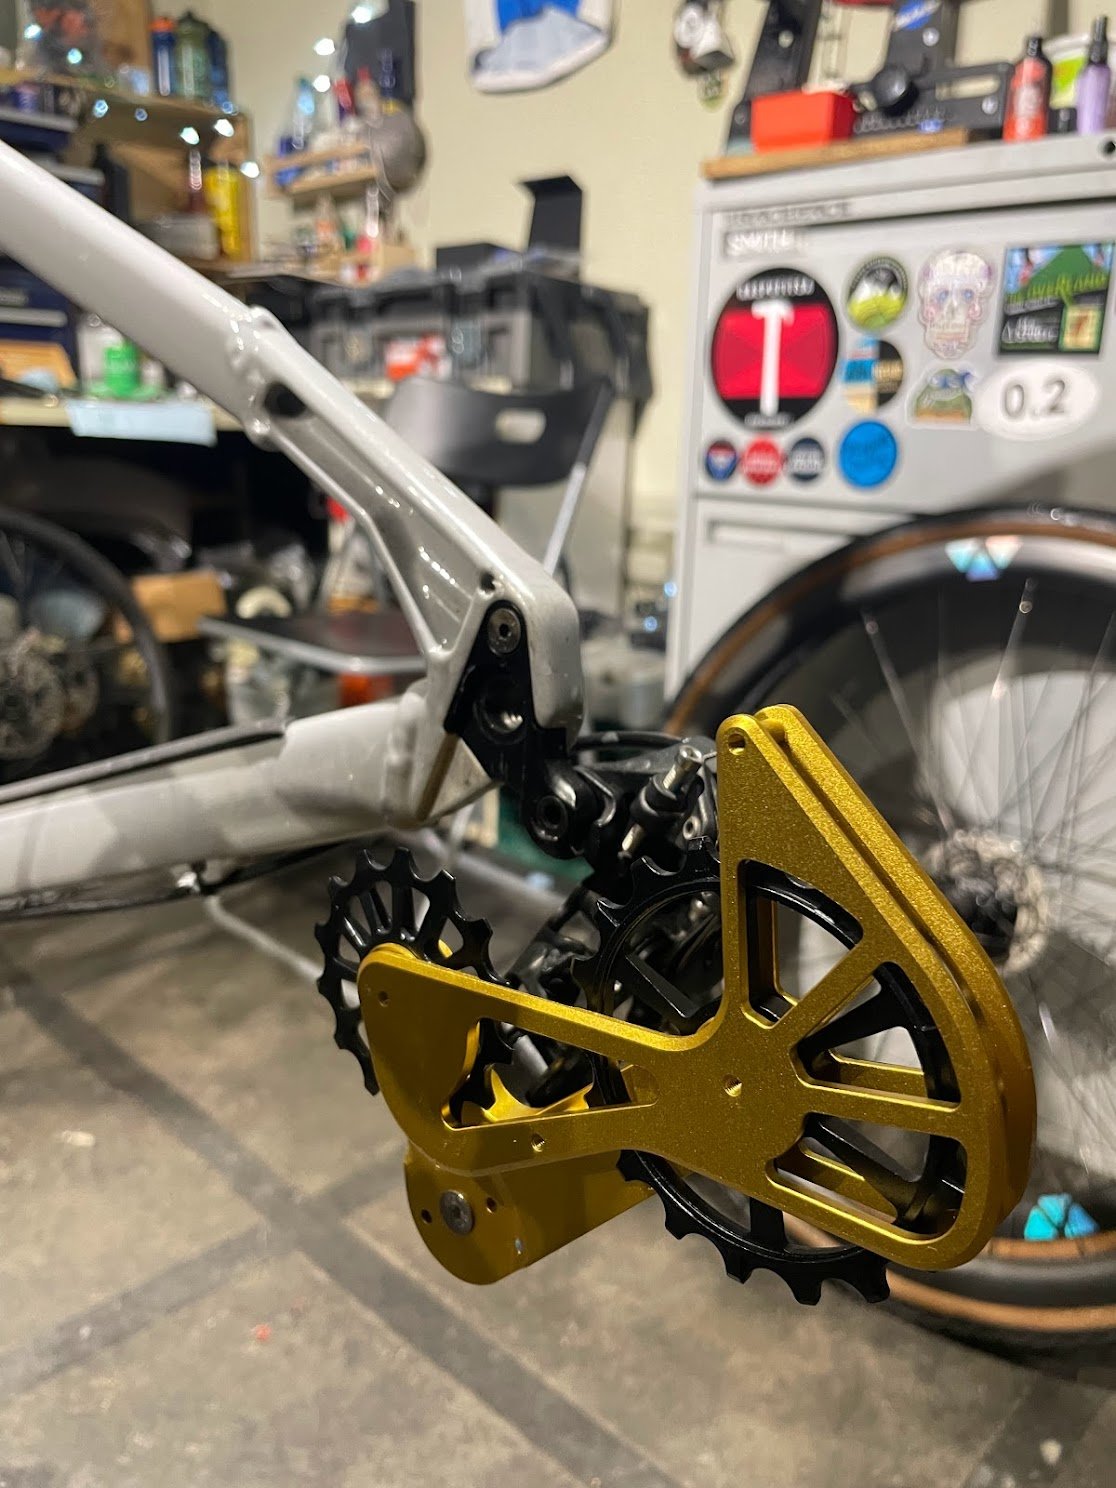
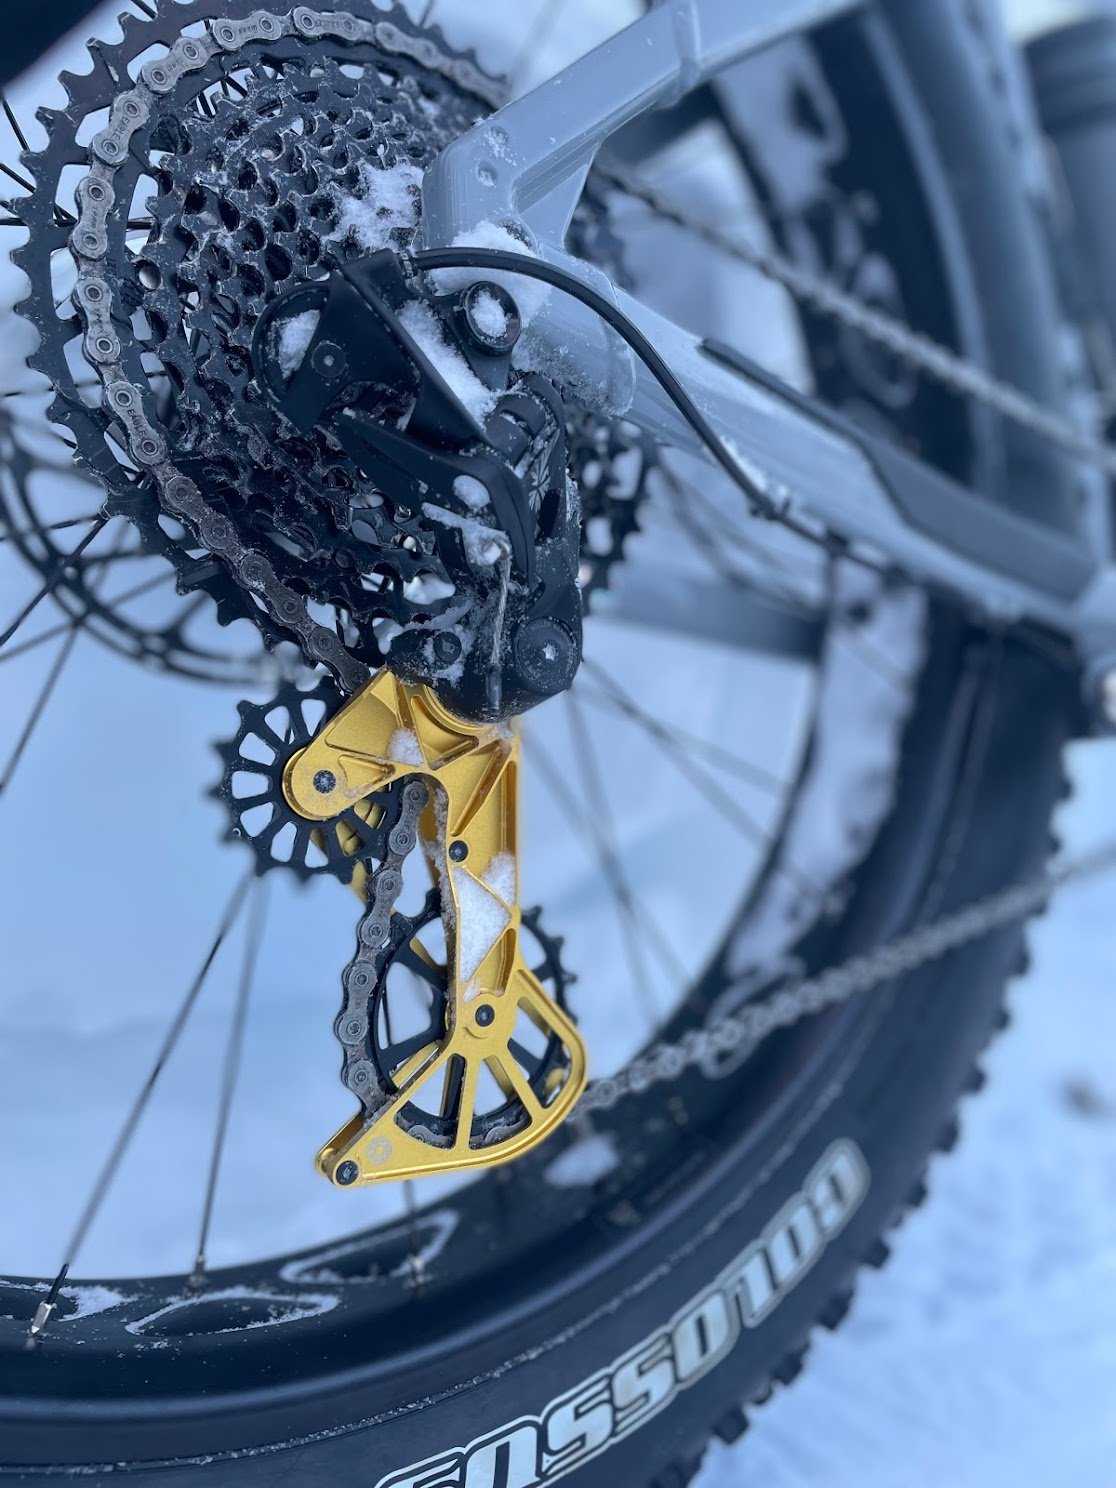
I swapped to a pair of Kogel ceramic-bearing pulleys after a few rides. Shifting precision improved immediately, and felt less vague. After a couple weeks their incredible Kolossos cage and oversized pulleys arrived, and it went straight on. Installation was simple, and I really appreciated that Kogel spares the paper by providing a carb with QR code to access online installation instructions.
Shifting quality didn’t seem to change with the Kolossos unit installed, but drivetrain drag did. It was striking. I’d pedal the bike and feel the chain moving incredibly smoothly, while I wasn’t actually rolling noticeably faster; I still had my stock wheels mounted! As a Kogel ambassador, I’m fortunate to be able to ride their products at no cost, and provide feedback to them on performance in harsh conditions. The Kolossos is a premium product that speaks to many riders, which is great; it’s a supremely well-made and beautiful component. Of course, it’s borderline hilarious to mount it to a NX derailleur, but that’s what I have. If you seek a balance of dollars-to-benefits for your fat bike, I’d suggest upgrading to their ‘standard’ pulleys that match your derailleur. Yes, drag will be a little higher than Kolossos, but shifting will still become more crisp., and their ceramic bearings hold up very well to brutal conditions; I recommend the CX seals. Fat biking on the singletrack we ride is more demanding on the shifting system than any other riding I do, so it’s worth it for me to have the best performance I can. I like the SRAM Eagle shifter less than the Shimano XTR on my Trek, so I will likely swap to my XTR drivetrain for my second winter on the bike.
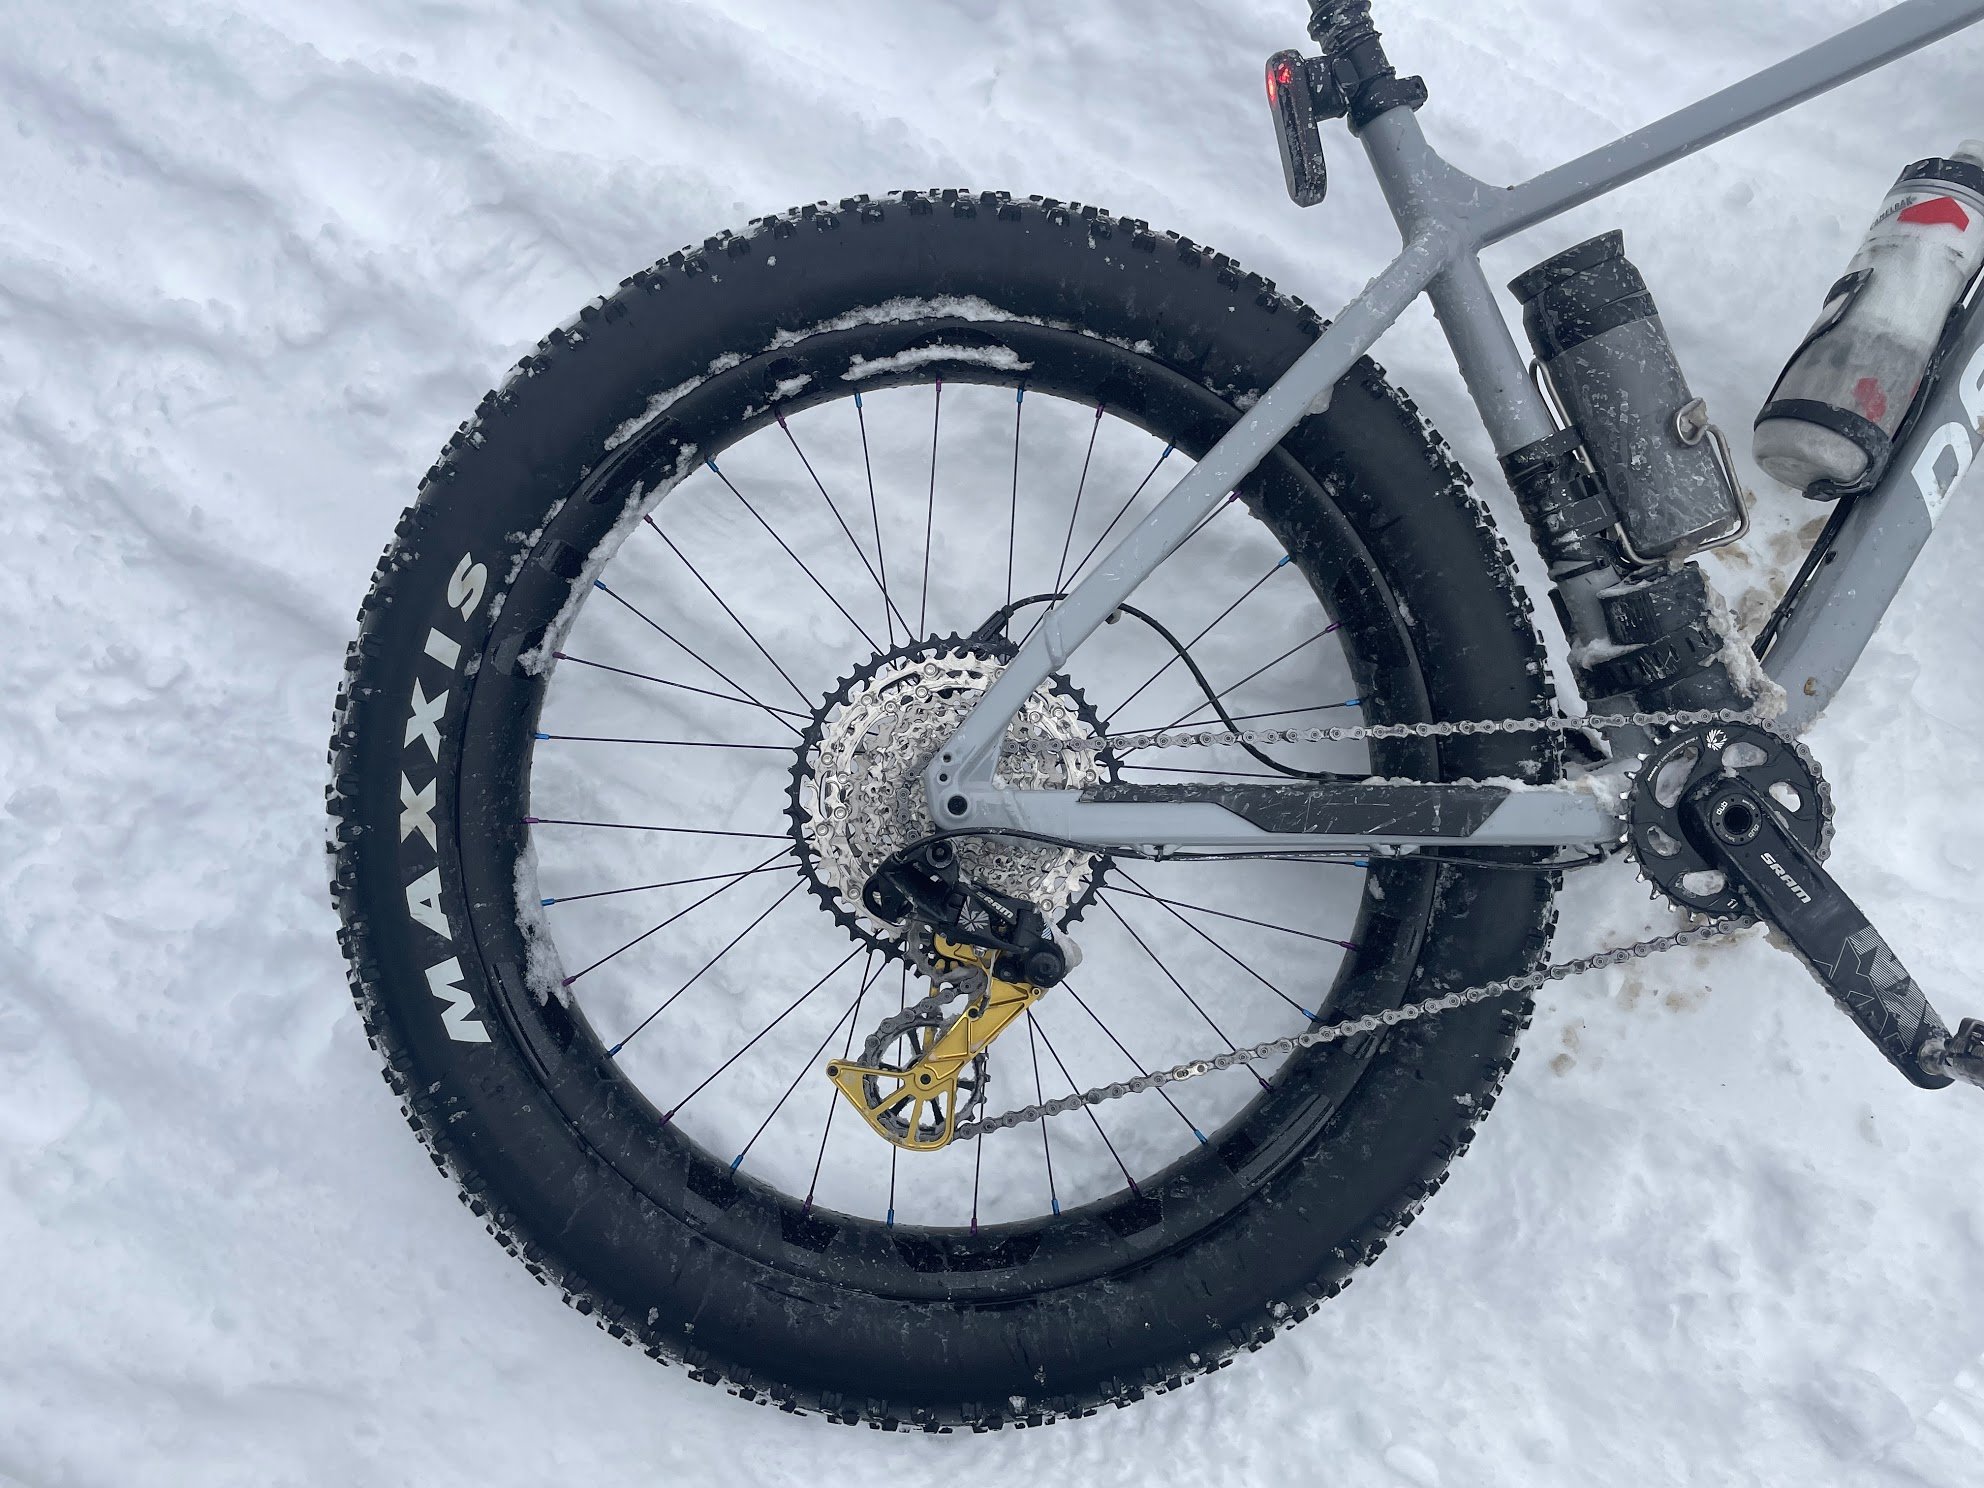
When I upgraded my wheels - details below - I went with a MicroSpline driver and mounted the new Shimano SLX cassette I had, which I anticipated would be both lighter and more precise than the SRAM unit. The SLX cassette strikes me as superior in terms of materials against the SRAM unit. SRAM cites 615g for their block, while Shimano claims 534. I’ve checked actual weights online, and these appear to be pretty accurate.
Paired with the stock SRAM X-Sync 2 ring 30T ring up front, the 12-speed Eagle chain didn’t run smoothly on the SLX cassette. I did a little research, and determined a non-Eagle chain should work, and based on my experience running an 11sp chain on my 12sp XTR drivetrain, I opted to mount a new one I had, pre-waxed with Absolute Black’s GraphenWax. This chain performs the same as on my MTB - well - and meshes smoothly with the X-Sync 2 ring, which is designed for 11 or 12sp chains. A 12sp Shimano chain would shift a little smoother, especially down the cogs in the middle of the cassette, due to special shaping on their inner plates, but might require using the Eagle master-link to work with the SRAM ring. Out of necessity, I used 11-speed chains on my XTR MTB form ore than a year, without issue. Shifting isn’t quite as good as with 12-speed Shimano options, but it’s reliable. The KMC I mounted has been fine, if a little clunky in the middle of the cassette.
Speaking of rings, the 30t steel ring makes for a great gear range with either cassette. The Eagle 1250 is an 11-50, while the SLX is a 10-51. I don’t care to have a 10t cog over an 11, nor do I feel the 51 as lower than the 50. I’m very rarely in the smallest cog, and the largest cog gets tonnes of use. We have many very steep climbs, and there’s no way I’d benefit from a larger front ring. My final mod for this winter will be an Absolute Black oval ring in 30t, which will improve my traction on the climbs.
Brakes
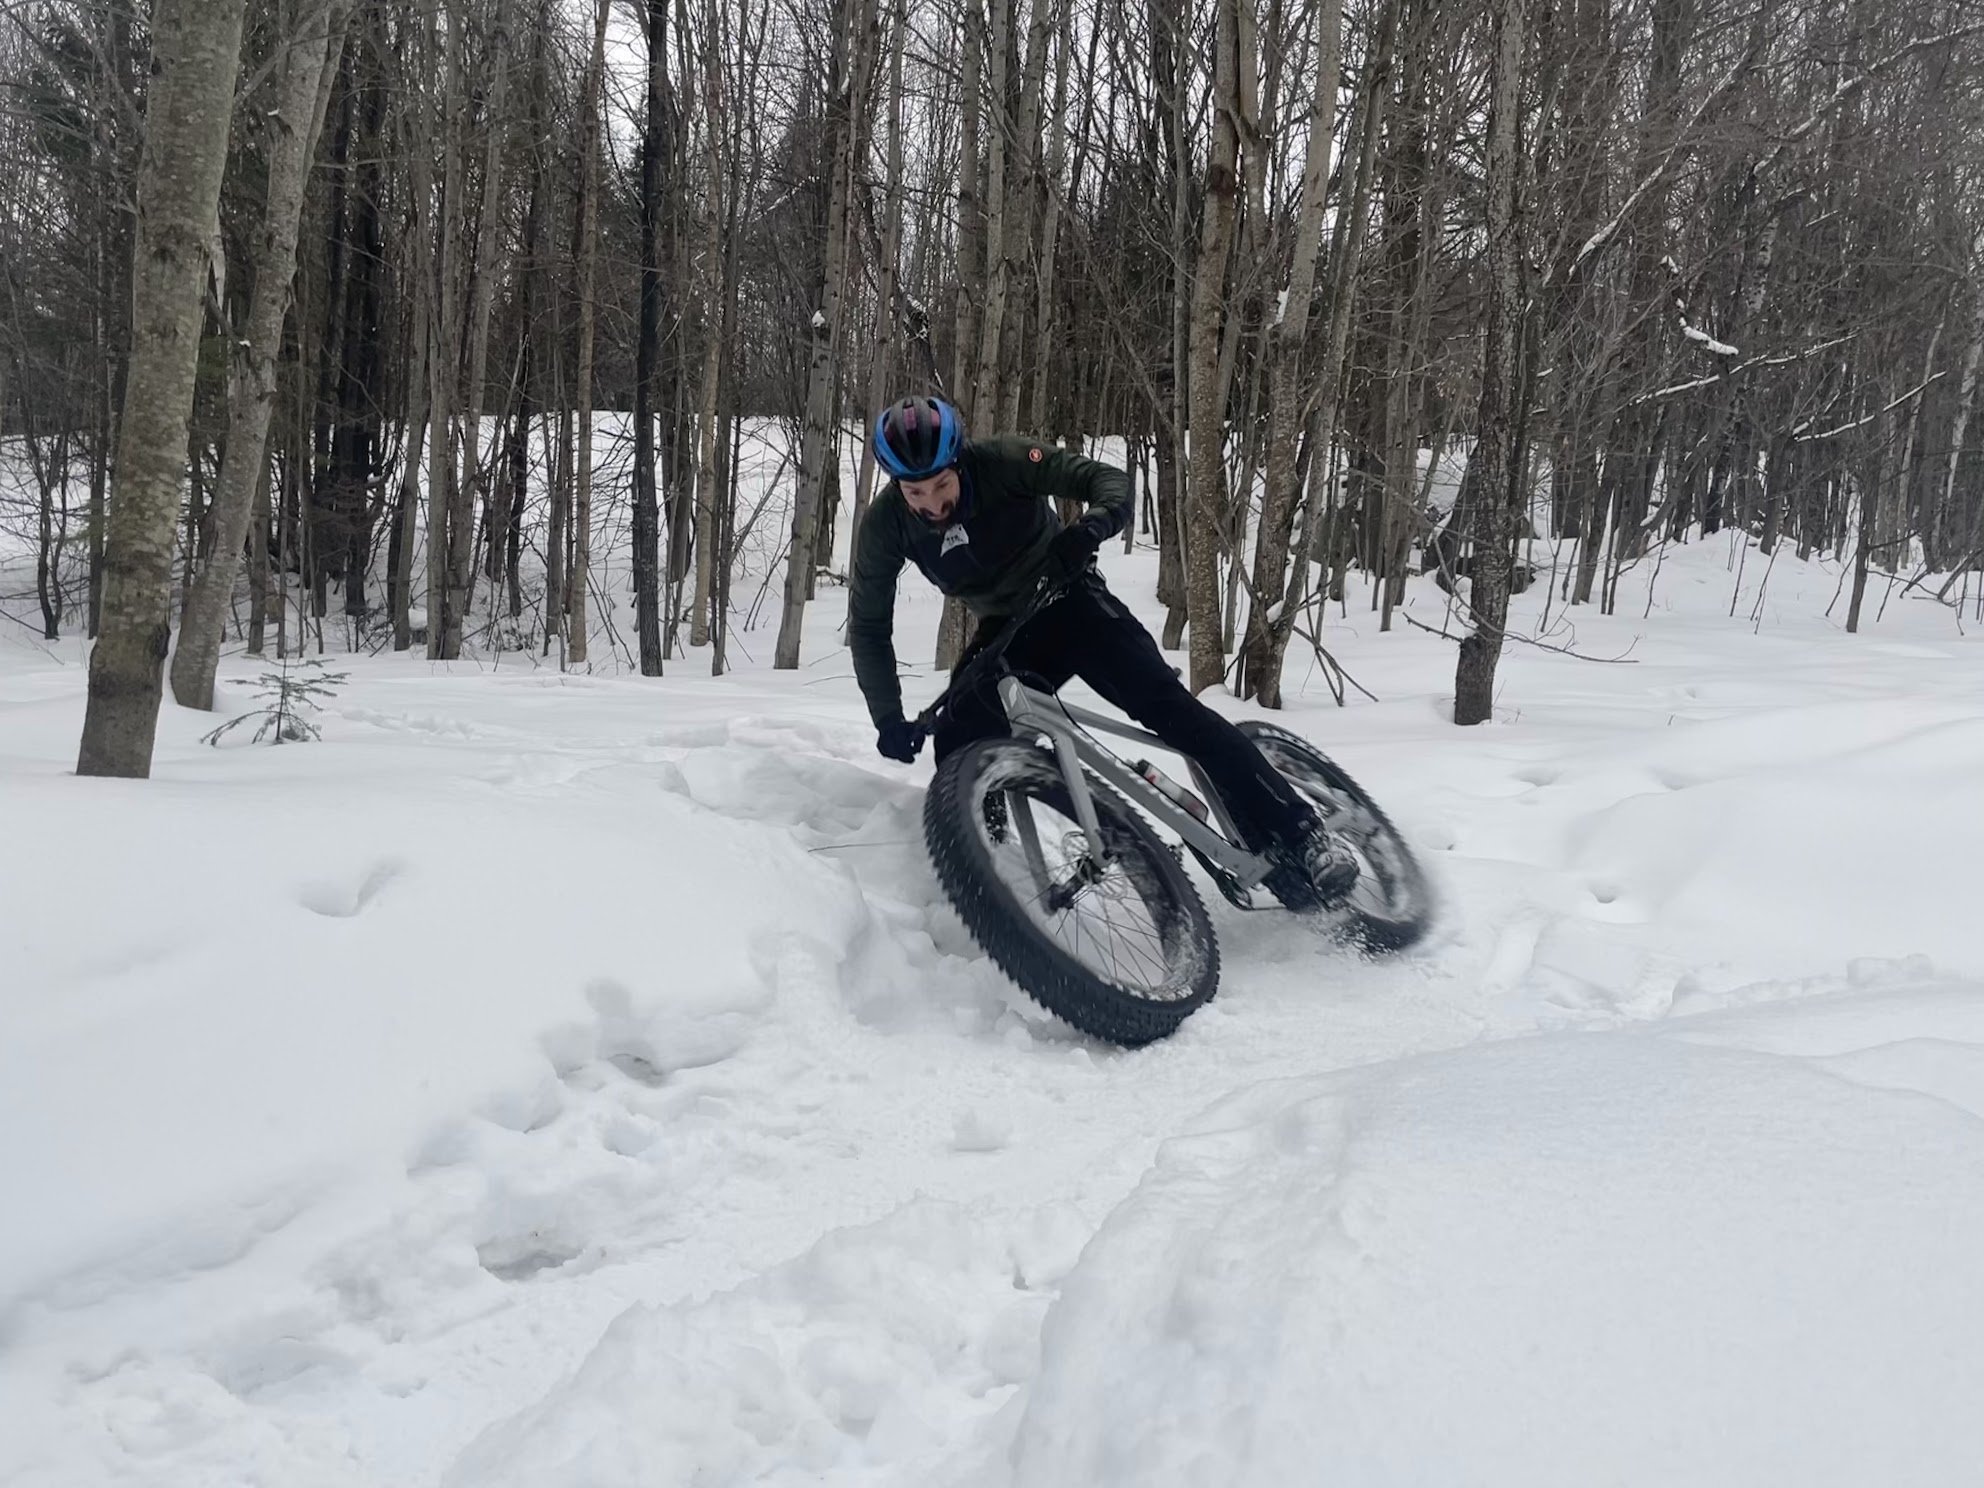
Technical singletrack in the ‘natural’ vein gets and keeps me vibing on fat biking, just as it does in the summer. I love having to work the bike across all axes, shift gears a lot, and brake hard. My favourite trails in my region are snowshoed, which tends to create tight turns around trees; hence the bar impacts. Tight turns with the opposite of berms on their outer radii are ridden fastest by skidding the rear wheel juuuuust right. Braking tends to be rather binary most of the time, though we do have a few descents that allow for heavy front braking for those who have dropper posts. Perhaps 90% of my braking is rear-only, and maybe 40% of these are lock-ups.
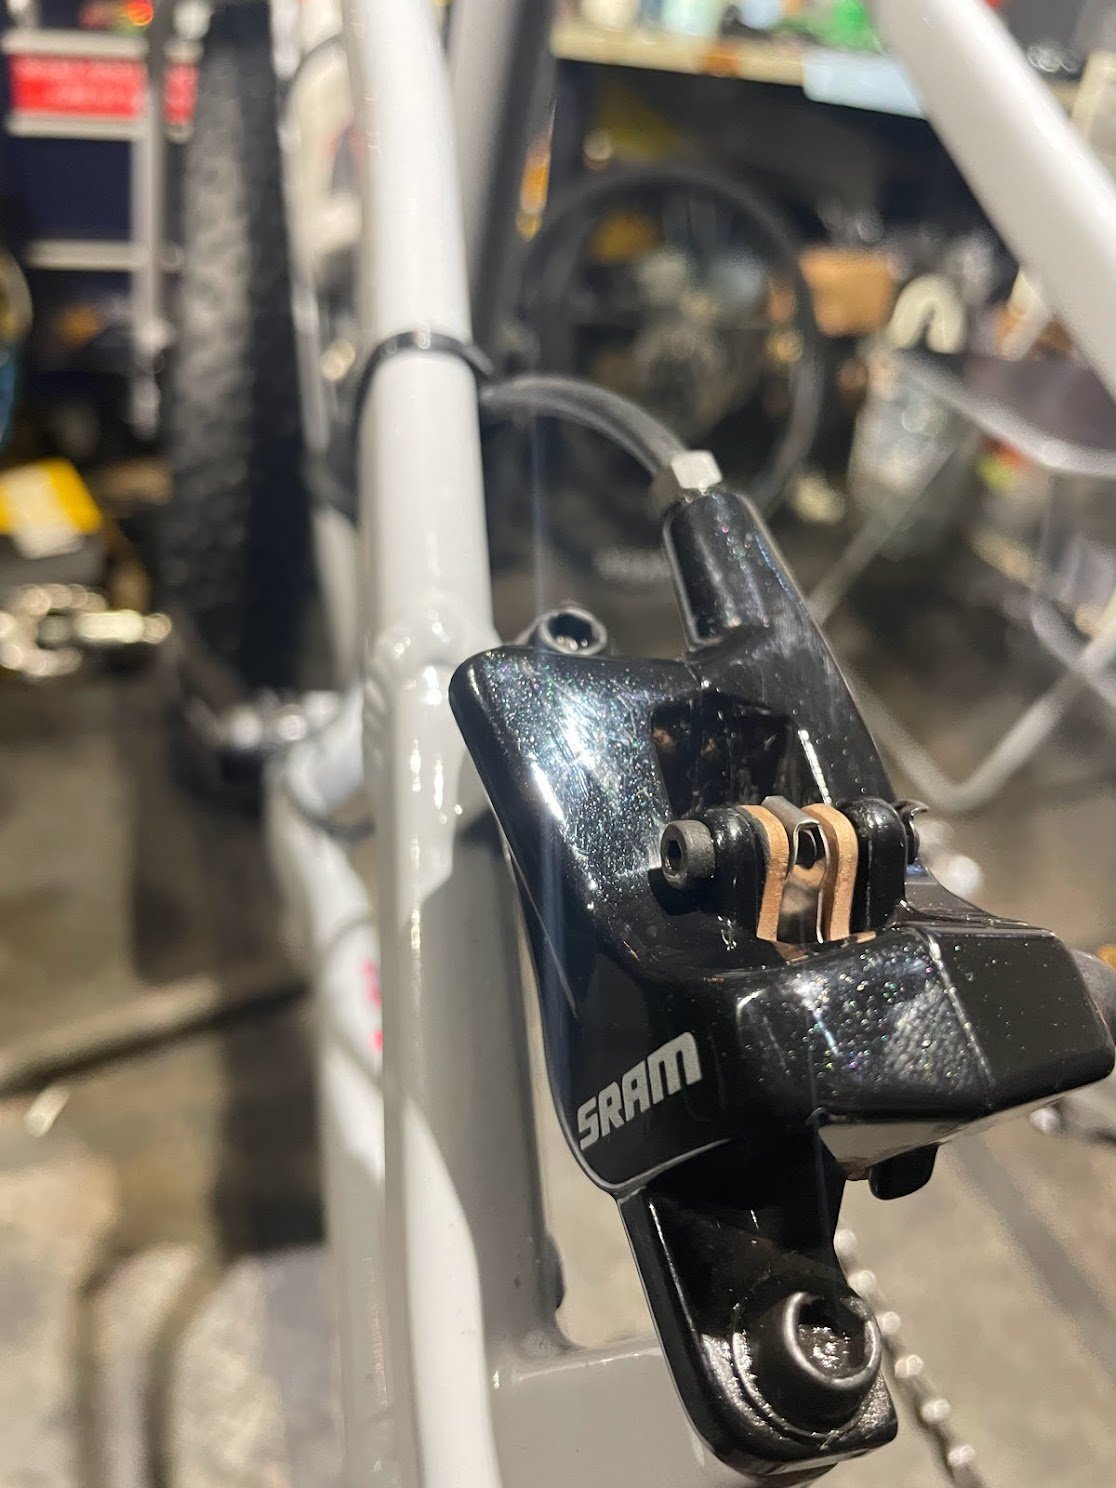
SRAM’s Avid Level T hydraulic disc brakes and 180mm Centerline rotors are decent. It bears noting that bringing any brakes up to full power in the winter will tend to be much harder to do than any other season; who wants to go out and do bed-in runs? Short, sharp baking on trails won’t do it, so a new bike like mine, ridden off-road off the bat isn’t likely to reach full braking power. This is something to consider trying to address in warmer months, and when choosing brake pads. More on that below.
The Level T levers have reach adjustment, and as you’d imagine, their lever-blades are alloy. I didn’t have an option handy for swapping out my lever blades for carbon, but would do so in a heartbeat to improve hand heat-retention.
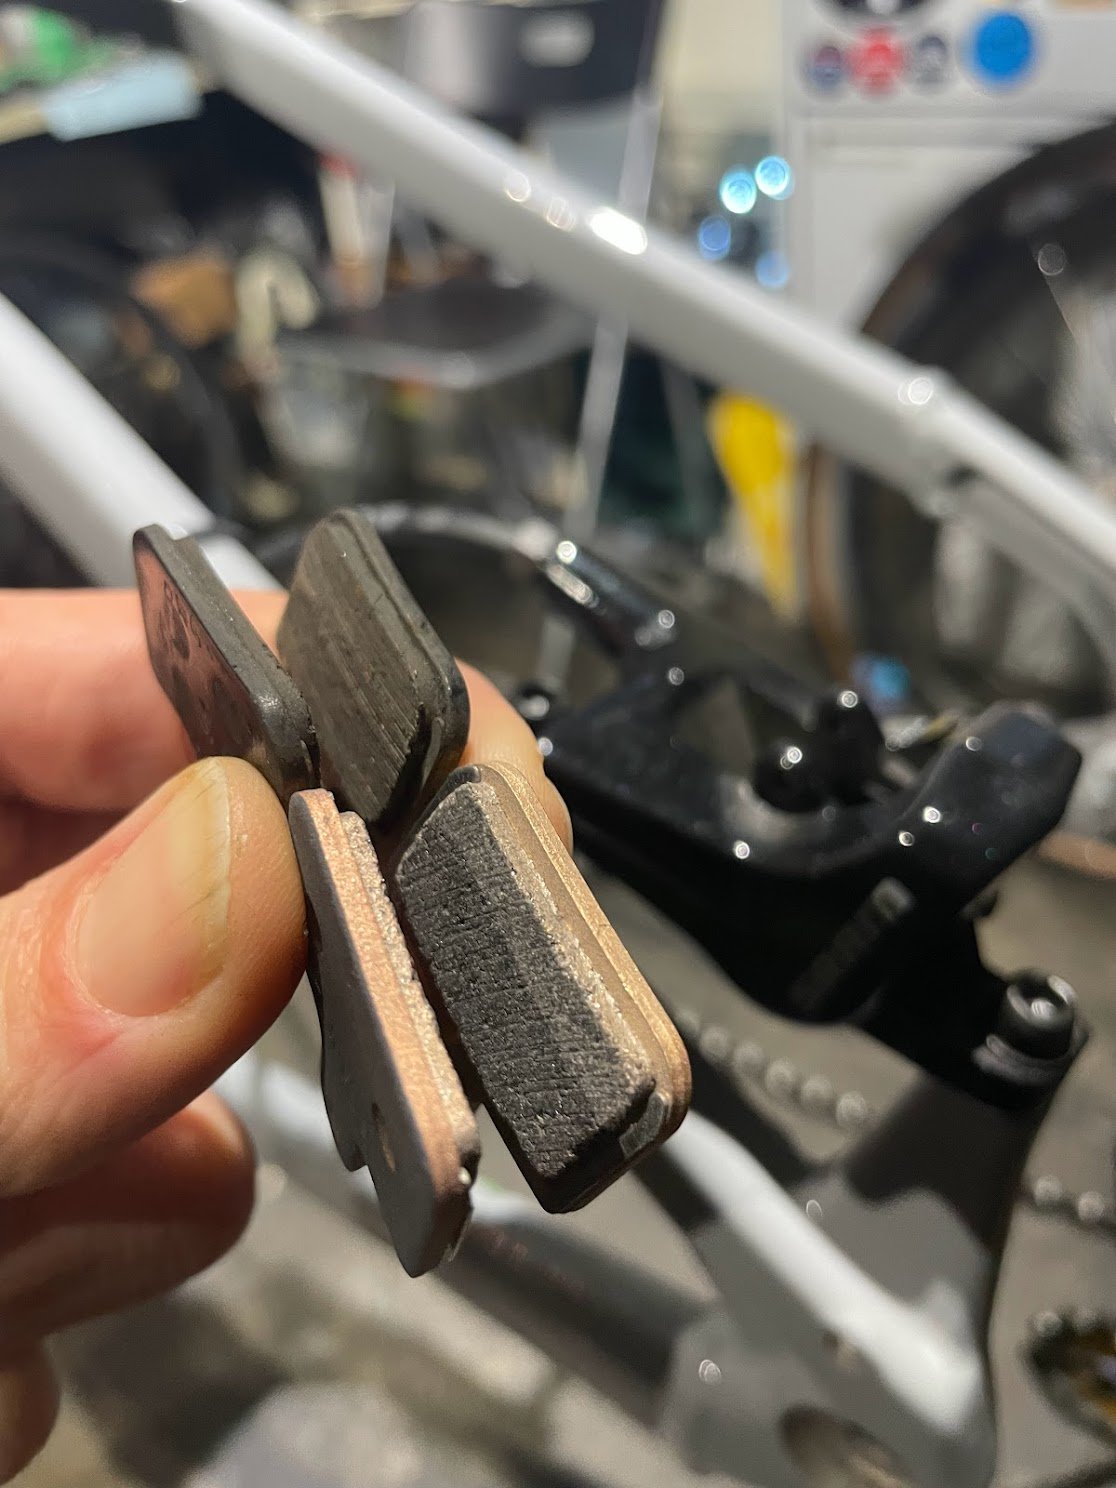
In terms of performance, I don’t know whether we’re likely to discover disc brakes that work reliably in the winter on singletrack. These brakes, like those of all my buddies (including Charles, on TRP mechanical brakes), are unpredictable. They ice up - don’t ask me how this actually happens - and squeezing the lever translates to zero brake action. This tends to occur after stops and crashes. It’s annoying, and potentially dangerous, but also seems likely the result of open caliper architecture, which is common to most modern disc brakes. I’d like to speak to brake makers and try to work out what’s going on here, but I’m not holding my breath. Anyhow, 180mm rotors are welcome - good spec - and the brakes are generally fine. The stock organic compound pads rarely bit as much as I wanted on the trails, which could have to do with limited opportunity to bed them in.
I wondered whether sintered pads would generate heat faster than organic, and help deal with the ‘frozen brake’ issue and lack of sharp bite I was experiencing. As if by fate, I received Kogel’s new sintered brake pads in January, which posed the opportunity to test an alternative. Kogel is producing two sintered compounds for different priorities. Their Kratos compound is effectively ‘harder’, biased toward durability in wet conditions and heavy braking. These pads reach maximum power when warmed up from lots of sustained braking. In contrast, their Bia compound is optimized for rides where braking is more sporadic, like XC, gravel, cyclocross. The compound is softer, so wears faster than the Kratos, but this generates more bite when the pads are not heated up. The Kratos pads will be ideal for gritty conditions on my MTB and spring all-road rides, while I went with the Bia on the Minus to get as much bite as I could.
While it seems the Bia pads are no exception when it comes to brake squeal on the trails - all of our brakes squeal when their rotors are wet, but we’re not generated extended heat - they do bite better than the stock pads, and generally feel more consistent in their power. Their brass pad-backings are ceramic coated, which is intended to help reduce heat transfer from pad-material to caliper pistons. I can’t evaluate the effectiveness of this coating, it’s impossible to discern. I can say that the pad material, which contains a lot of metal, will rust, so it’s wise to give them a cleaning regularly. Brake calipers are the most prone to salt corrosion of all components on the bike, in my experience, so it’s worthwhile to spend a little time on them.
Wheels
I’ve saved the best for last! All the changes I made to the bike influenced its performance, but were not transformative individually or in sum. This was no surprise; each modification was subtle. The bike was still annoyingly heavy to lift, and felt heavy under me while trying to make it change attitude across any axis.
Wheels tend to contribute more to how bikes feel under us than anything else, including frames! Never evaluate a bike’s performance without controlling for wheels, including tires (and tire pressure). A bad set of wheels can make an amazing frame feel terrible, and a good set can make a mediocre frame feel great. The principle driving this dynamic is that flex within the bike, as a system, is good to a point. A road bike with 25mm tires and stiff wheels needs to have beneficial flex/comfort built into the frame, seatpost, saddle, handlebars, and grip-tape. A cyclocross bike with 33mm tires at 22psi benefits from stiff wheels (though a little less stiff could be good), comfortable contact points, but a slightly stiffer frame, to handle a lot of torque applied out of turns, up climbs, etc. The overall feedback the bike needs to communicate is ‘fast,’ and this is about ‘breaking even’ in the balance of deformation and energy return that occurs in our tires, wheels, frame, and components we’re in contact with.
A fat bike runs air pressures as proportionally low as tubular cyclocross tires, and building lateral flex into fat bike wheels poses no benefit on snow. Perhaps the most effective cyclocross wheels have some lateral flex built in, to conform to the ground better as the bike is leaned; pro downhill MTBs are being run this way by some pros, using low spoke tensions. Probably not, however, because low spoke tension also translates to ‘wind-up’ of hubs within the wheel structure, under pedaling and/or braking load. This means pedaling torque can rotate the hub within the wheel’s structure without translating directly to rotation at the rim and tire; there’s a lag until they ‘catch up.’ On the front, disc brakes can also ‘wind-up’ the hub in the opposite direction, storing energy in the spokes that can break the tire loose, and cause ‘chattering’ across the ground. For a fat bike, there’s so much deformation happening at the tire, additional flex in the wheels and frame is not beneficial. Downhill can be considered a specific use-case, as most acceleration is achieved be letting go of the brakes, not pedaling. Wheel chatter with loose spokes is mitigated by very active suspension; rigid bikes don’t have this working for them.
The Minus runs 27.5” wheels, which, frankly, I’m not totally sold on. While I was not paying attention, the bike industry decided 26” wheels were too small for fat bikes. When I picked up the Minus I didn’t even know which size wheel it ran; surprise! Ok, whatever. On paper, 27.5 creates a larger contact patch than 26”, which reduces the need to run tires as large as 5”-wide, which can get rather bouncy around and below 5 PSI. It’s true, bouncing tires are not cool, and the 27.5 size creates a longer contact-patch than 26”, which could translate to more cornering grip (like running longer skis) and more climbing and braking grip. Without comparing wheels sizes with equivalent tires, I can’t say for sure how the differences stack up, but I can say that my wheels are the virtually identical in diameter to Iain’s 26’ with a 5” Surly Bud tire. So ride height is the same as with a big 26” set-up, and the dropper post improves clearance in this regard.
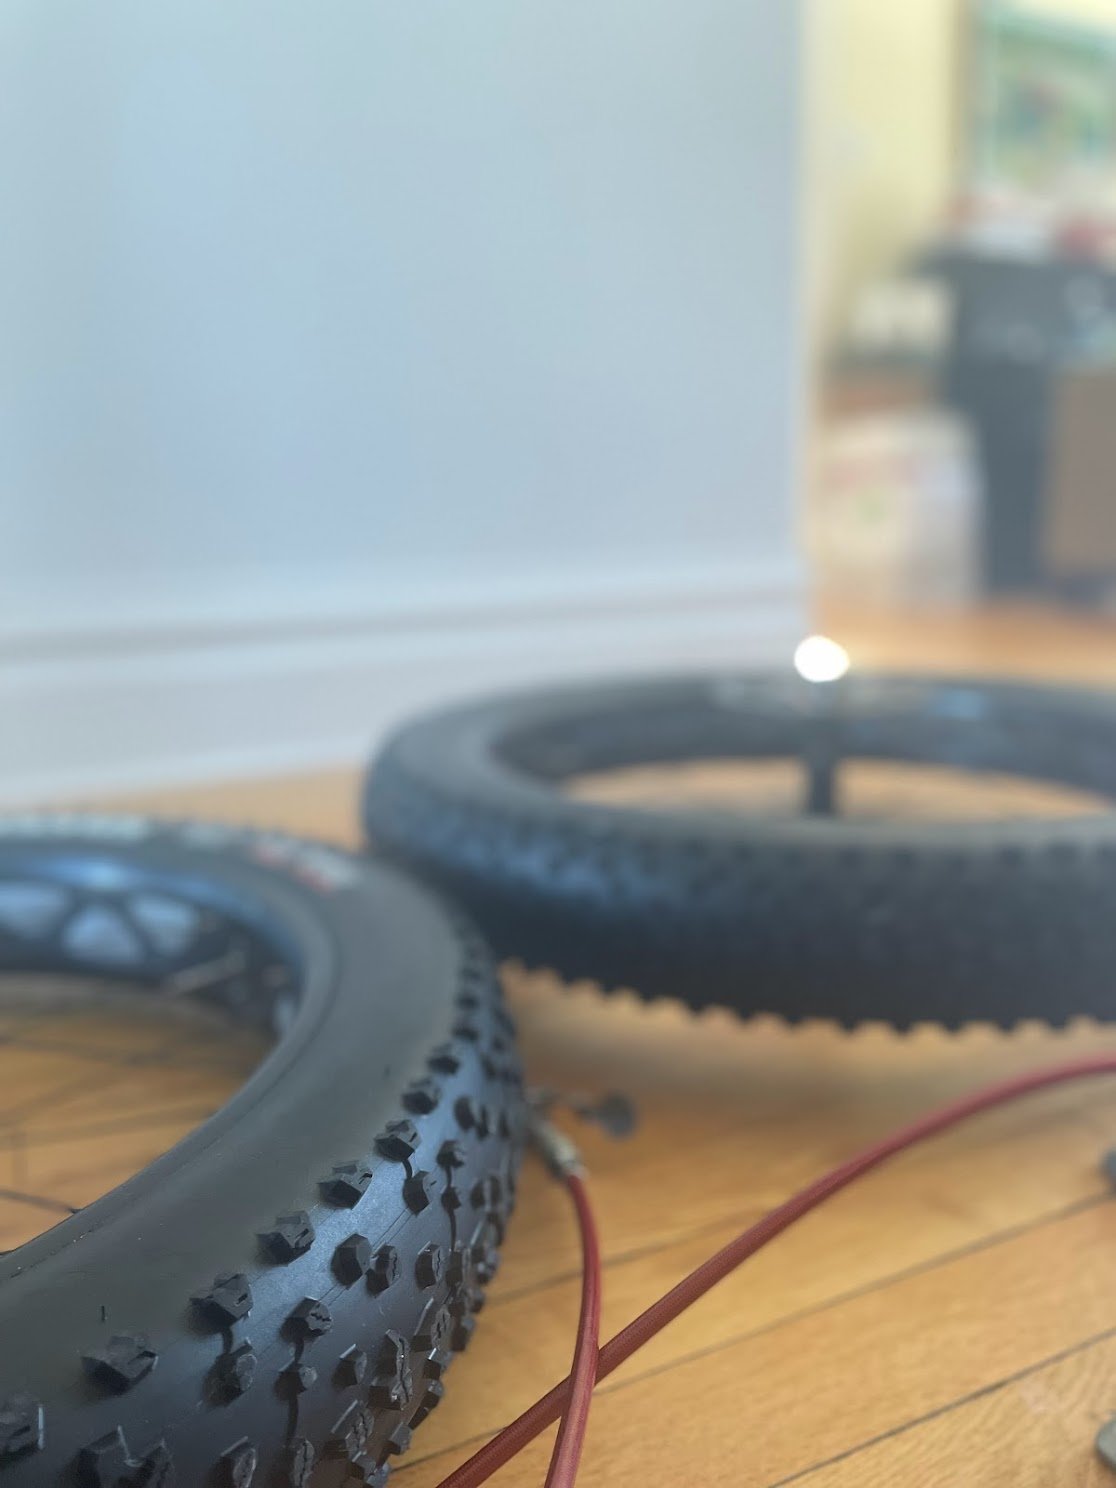
The bike comes with thick, heavy, butyl inner tubes within Maxxis Colossus 4.5” tires mounted to generic 90mm-wide alloy rims. The tires actually measure about 4.3”, and their tread makes me wonder whether the bike industry has decided that fat bikes are for hard, groomed trails and pavement. It would be difficult to evaluate the grip of my set-up against my buddies when they all had chunkier treads on their bikes. With tubes they rolled well on hard-packed surfaces, but became increasingly ineffective and slow as pressure dropped for softer conditions. How much so? Enough to be easily discernable while riding behind friends on tubeless set-ups. I could tell I was putting out far more power at the same speed; this is based on lots of riding we’ve done together over years. Perhaps the Colossos’ close-pattern tread is meant to offset the slow-rolling of heavy, tubed wheels, and create a ‘reasonable’ parking lot feel?
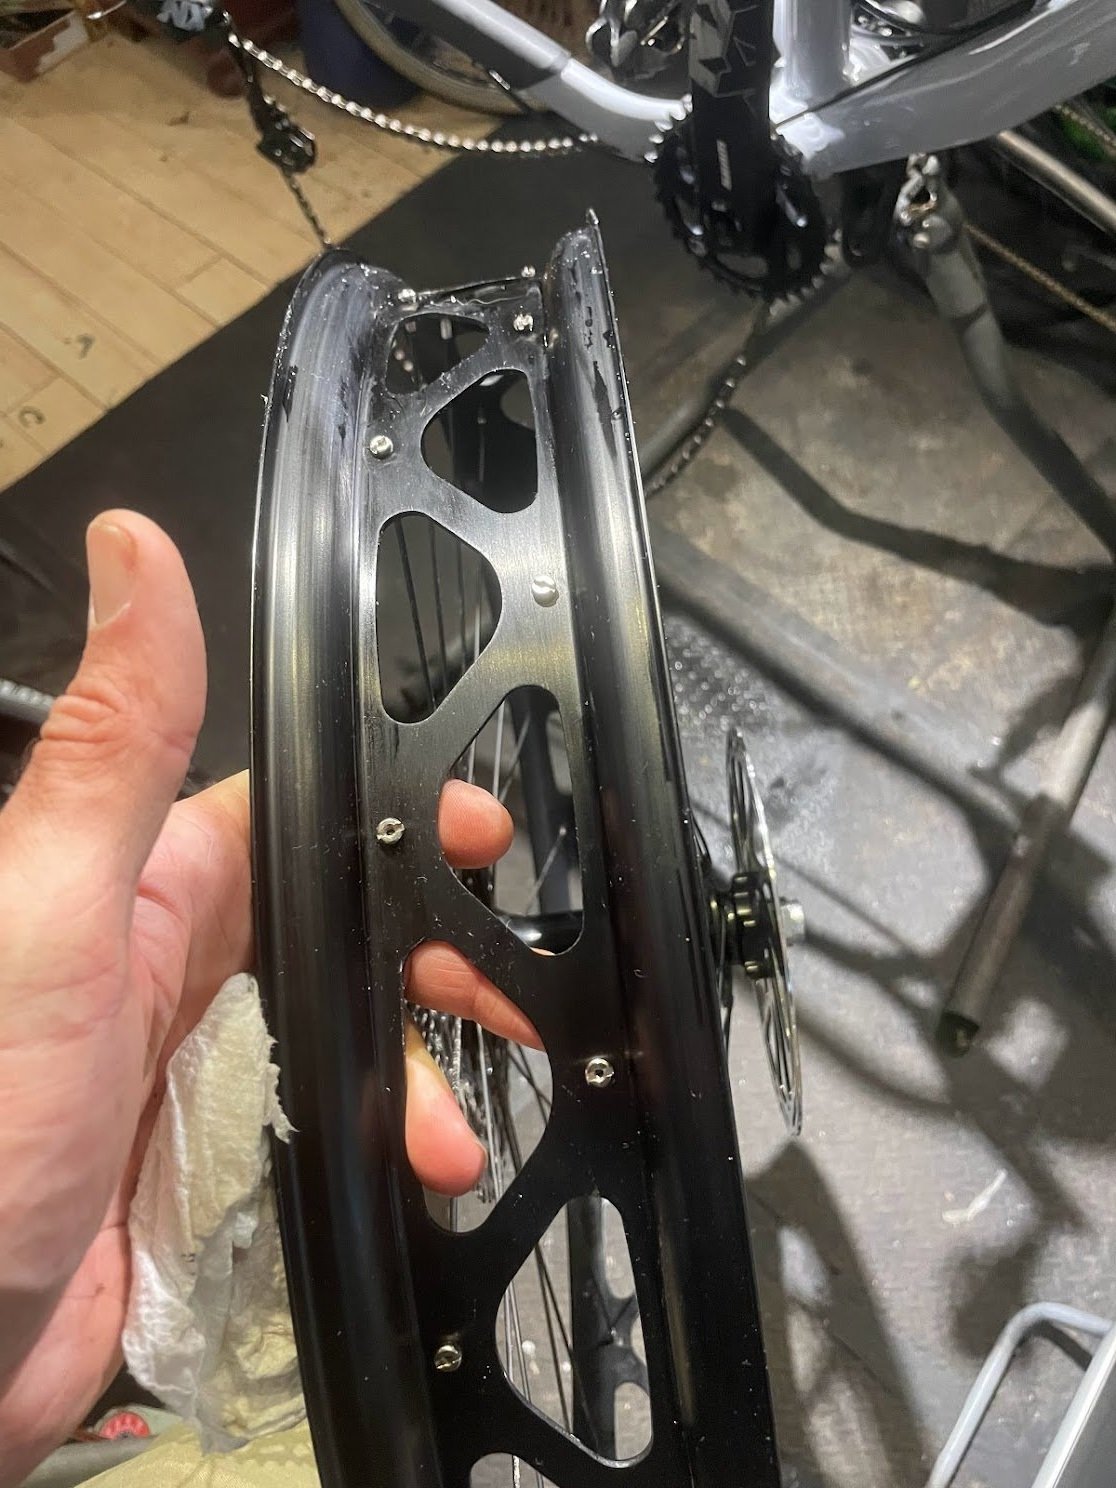
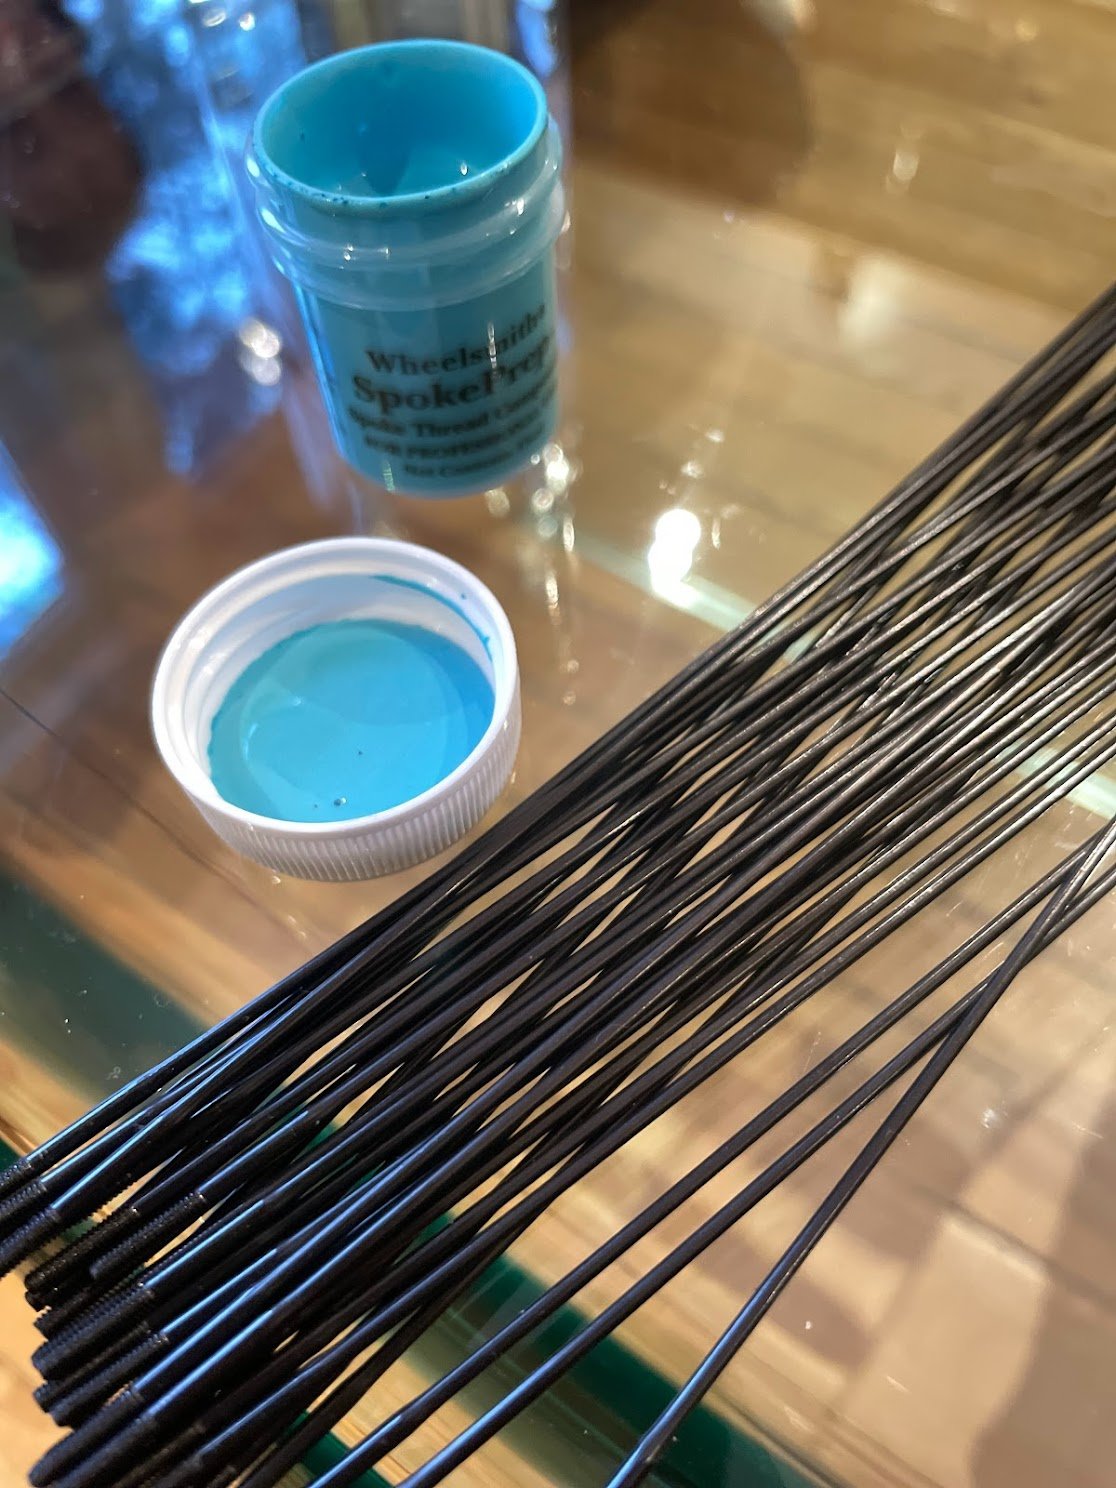
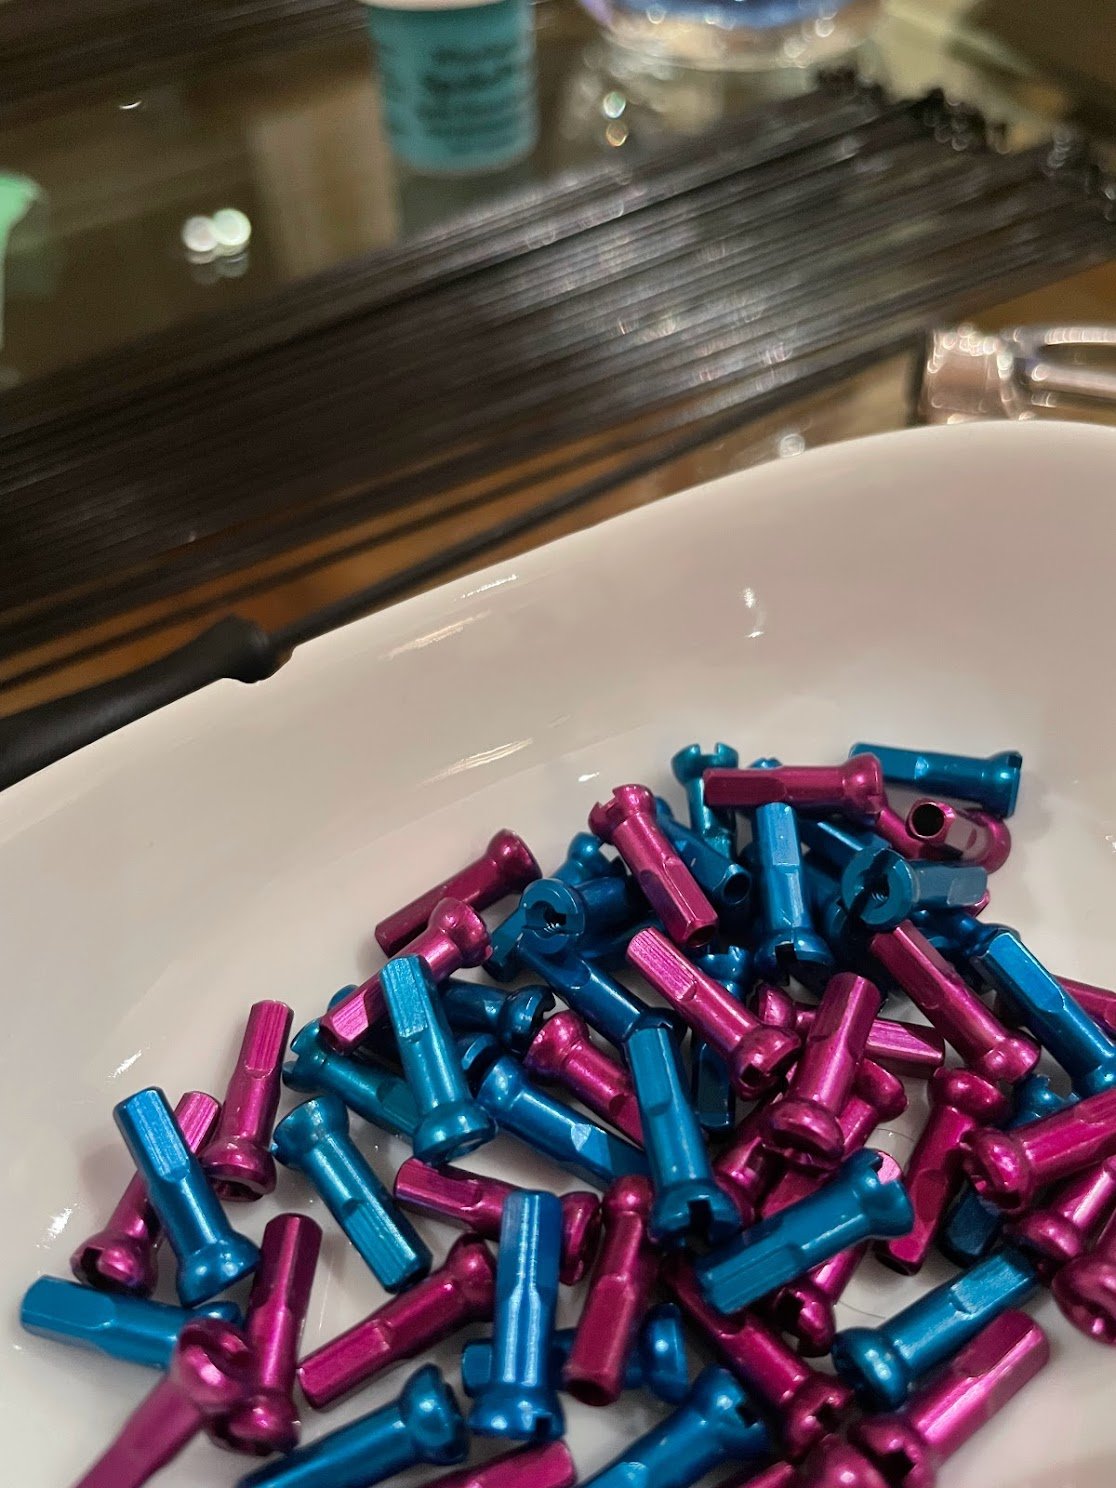
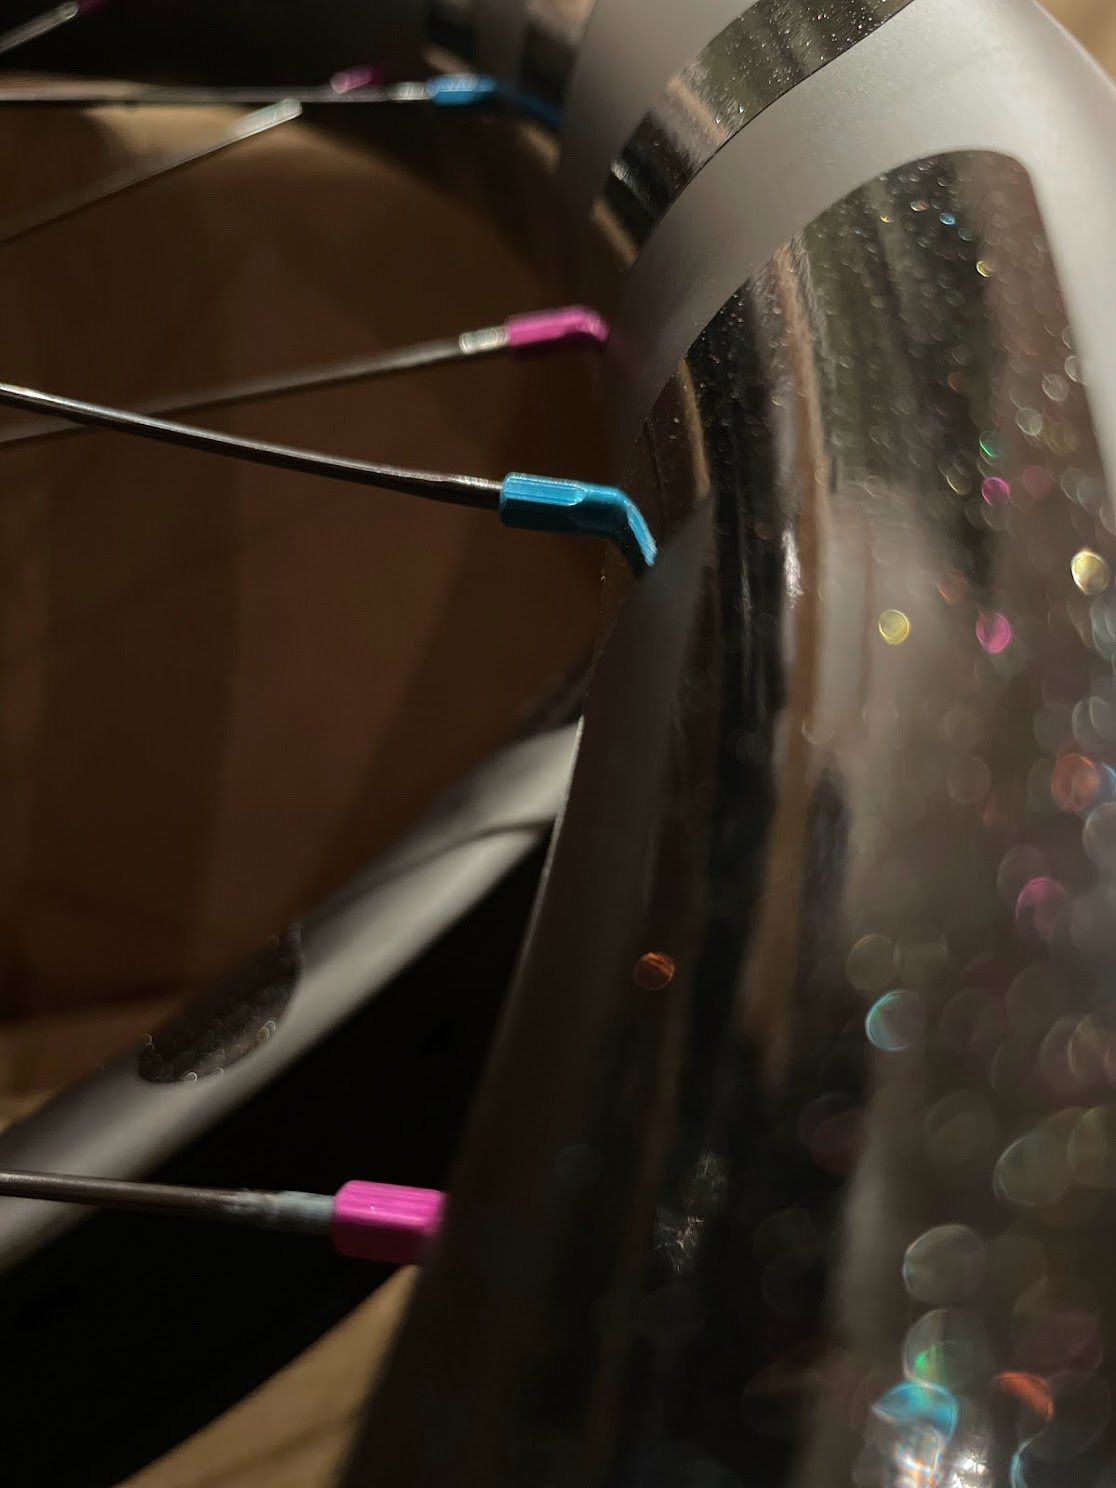
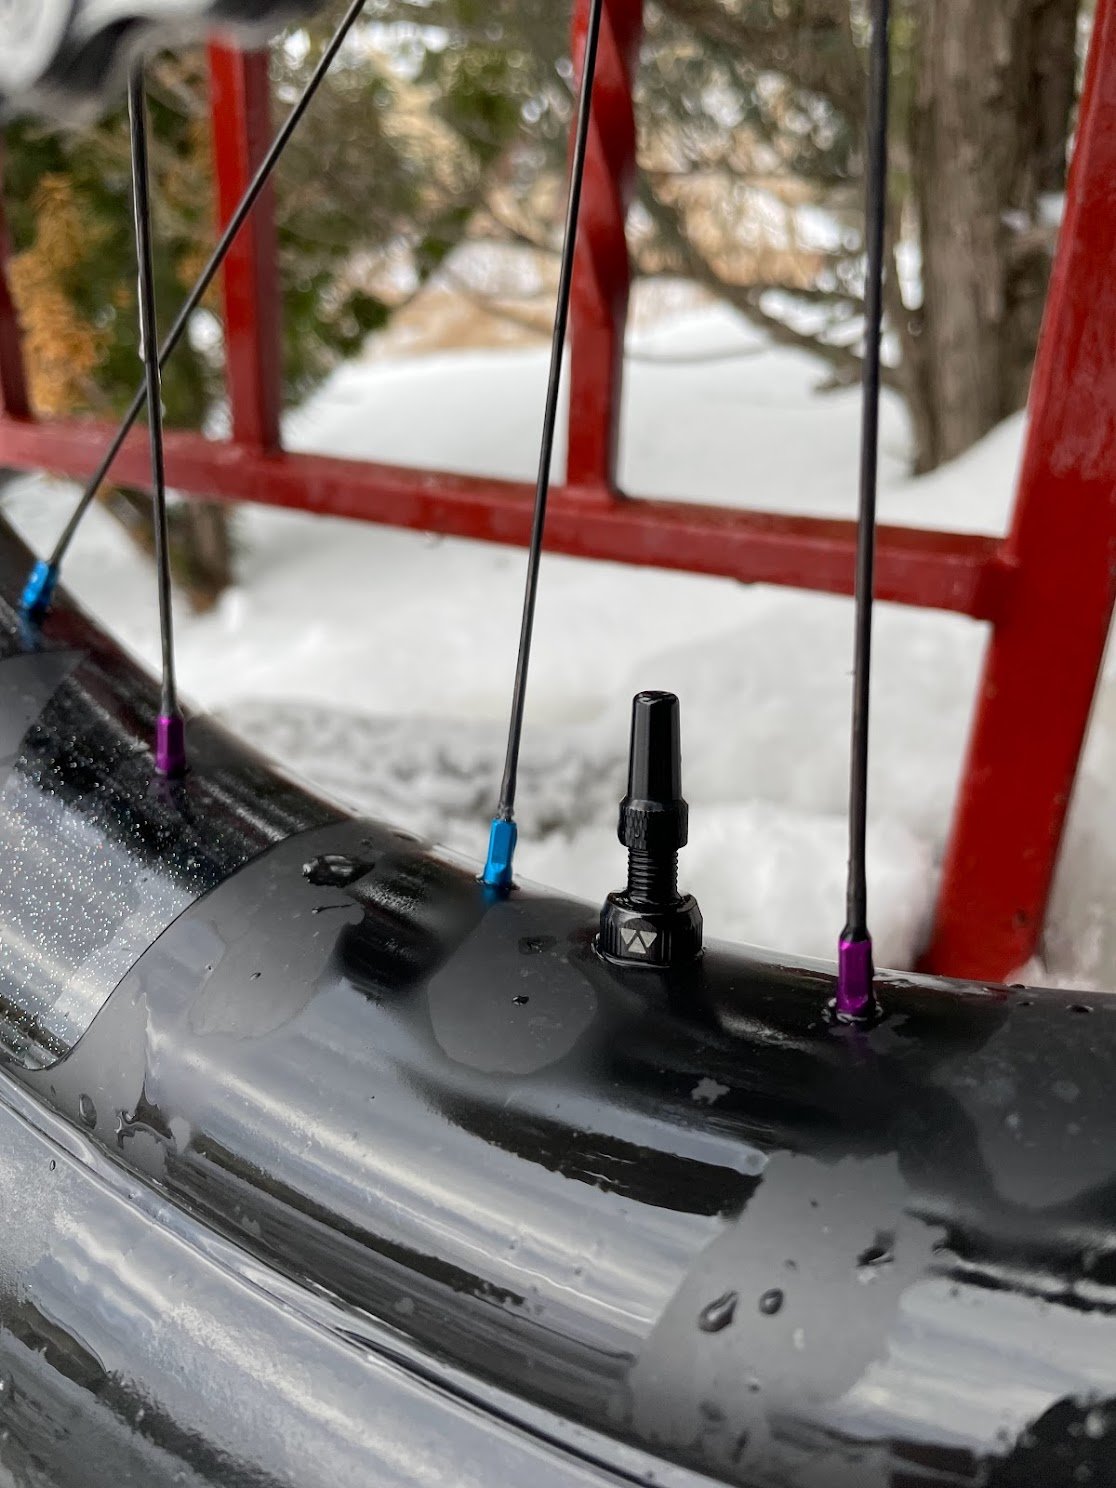
The stock rims are relatively ‘soft’ alloy, which cannot be tensioned nearly as high as quality rims like Woven’s. In order to be even remotely not-insanely-heavy, the stock rims are single-walled. This exposes spoke heads to the rim strip or tape one might use to seal them. It also means the rim is a weaker structure overall than a double-walled rim. My rear wheel was built with a significant low-spot (not round), and spoke tension was low enough to make them feel vague. Could I feel spoke wind-up? No, but I’m convinced it occurred under braking, because my rotor bolts and caliper bolts on the rear all loosened off, after being set up properly by me. This is is from the wheel chattering under braking. Woven wheels - of any type - are suitable for building at high tensions. This has worked well for us for years, and continues to drive strength requirements for the rims Jamie and Kent - Woven’s co-owners - specify / procure across the range.

There’s ‘tubeless’, then there’s TUBELESS
Get these tubes outta here! I was VERY keen to convert the Minus’ stock wheels to tubeless immediately. Fat bikes benefit from tubeless format more than any other bike type for a couple reasons. The dynamic at play is about how low-weight and tire compliance work together to influence grip and kinetic energy. Fat biking - on singletrack - is very much about inertia and momentum. On a road bike covering flat ground at steady speed, bike weight barely matters, and heavy wheels can actually be beneficial (heavy wheels function as fly-wheels, which take longer to build rotational inertia, but also take longer to lose it). On the flip-side, off-road disciplines involve almost constant shifts in speed that amplify the benefits of lightweight set-ups, to a point. For downhill riding, bikes that are too light bounce around too much. For cross-country, too light would tend to be more of a durability issue than a performance one. I.e., superlight components might work well but be fragile.
Fat bikes require very low tire pressure and a great deal of tire deformation to conform to trail surfaces that are both irregular and soft. When the snow is not well-adhered (more often than not the case), the tire’s footprint needs to spread out over the snow and maximize knob-edge contact in order to grip. ‘Railing’ the tire’s shoulder knobs will only work when the snow is very firm, and doesn’t break away under the tire’s tread (the smaller the contact patch - think rail of tread - the more focused weight is on a small area of ground). So what we want is a tire rolling at 6PSI or lower (for a rider around 175lbs), which is squishy. At this sort of pressure, tire ‘suppleness’ massively influences rolling resistance. Regardless of tubed or tubeless, if the tire’s construction resists compression without any air pressure, this ‘structure’ will ‘push back’ against load as it rolls over the ground. In other words, it will ‘want to’ resist being crushed. In contrast, a very thin tire can deform/crush under very low force; picture how ‘floppy’ a high-quality road tire is. A ‘floppy’ tire will rely on air pressure to control its compression, and will thus be very sensitive to pressure changes. A ‘stiff’ tire will rely far more on its own structure to control compression, and will be less sensitive to air pressure changes.
At high pressure, like 10 PSI, both types of fat bike tire - stiff or supple - in otherwise identical form will roll very close to the same, because deformation is minimal for both. Deformation of knobs on each tire - especially on pavement - will be felt more than the whole tire deforming. Drop the pressure on these tires to 5 PSI, and the light/supple construction variant will feel ‘springy’, while the ‘stiff’ one will feel ‘sluggish,’ as if you’re riding in mud.
The key here is that tubeless tires have very little compression or rebound ‘damping’. The stiffer a tire’s casing is, the more it 'damps’ forces that crush it, and the energy returned in rebound. That damping occurs in the form of friction between the threads and rubber that comprise the tire, and, additionally, between tire and tube when tubes are used. The colder tires are, the more energy is ‘lost’ when the tires are constantly under compression and rebound cycling, and this loss is amplified with butyl tubes. But before elaborating on tubes, a but more about damping.
Tire volume and construction determines ‘springiness’ at a given air pressure, and we can think of this in the same way we do with suspension forks and shocks. We have an air chamber, and we have tire structure functioning as the damper, with a tube increasing damping. As tires increase in volume, their air compression rate flattens. This is also known as ‘ramp-rate’ or ‘spring-rate:’
Spring rate is expressed as the amount of force required to compress a spring a set distance. The measurement is expressed in metric (kg/mm) or in standard (lbs/in). - Source
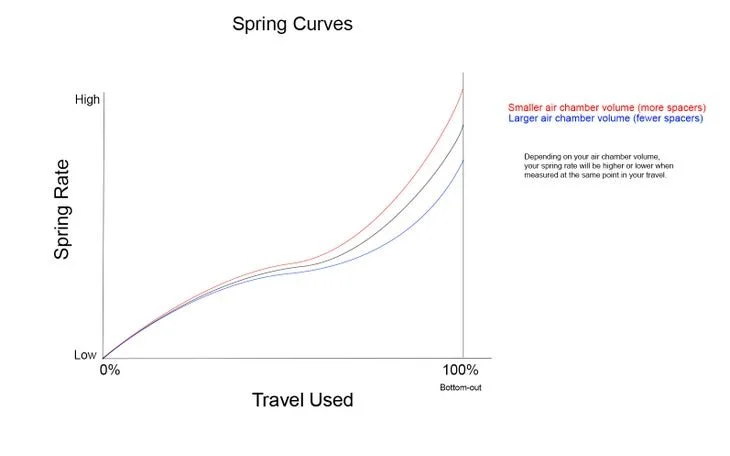
Click image for source.
When compressing air, chamber volume determines spring rate. In a suspension fork we can manipulate the air chamber volume with ‘spacers’: solid discs of plastic. At a given air pressure, the smaller the air chamber, the more ‘progressive’ spring-rate becomes. Small bump sensitivity will be roughly equivalent between forks with subtly different air volumes, but as they compress through their travel, the smaller volume fork will be more difficult to bottom out. Its air spring progression curve is more logarithmic, versus ‘linear.’ If you want your fork to feel ‘stiff’ at full extension, a high air pressure will resist compression under pedaling load. It wouldn’t make sense to also run volume spacers to increase spring-rate, because it would already be difficult to access full travel with a high air pressure. In contrast, to achieve the most supple and active suspension performance possible, a low air pressure, combined with the maximum number of volume spacers allowable would create the most progressive spring rate possible, with the goal of coming just shy of bottoming out the suspension often. Whatever the set-up, suspension forks mostly use controlled oil flow to constrain compression and rebound. This helps avoid bouncing, and fine-tunes spring rates so that the fork reacts differently when absorbing impacts, versus receiving input from the rider’s body movements and braking forces. Rebound damping is essential to control the return of energy on the backside of a high-speed impact.
The ‘spring’ a compliant tire has with a tube in it, versus none, varies drastically. Most fat bike tubes are thick butyl rubber, which is actually not particularly ‘stretchy’ compared to latex. When these (massive and very heavy) tubes are in even supple tires, tire compression requires them to stretch, which they don’t want to do. Also, when sandwiched between pressurized air and tire casing, friction manifests. This is called ‘hysteresis,’ which equates to energy 'lost’ as waste heat, versus translated into forward movement. At the same time, these heavy tubes contribute weight at the outside of a rather large-diameter rotating structure, which requires more energy to get to change rotating speed than a lighter assembly. It also holds more inertia, which requires more brake force to control. Sometimes this inertia can work in our favour, to help carry momentum. But on snow this benefit tends to be eclipsed by the benefits of lower rotating weight.
A large (4.5” +) heavy casing tire at low air pressure performs like a suspension fork at low air pressure with no volume spacers and compression and rebound damping turned up. The tire resists compression structurally (compression damping), while its low pressure and large volume doesn’t generate a lot of spring-rate to return energy to the ground as it deforms. This low spring-rate, which is rather ‘linear’ (like blue line in chart), can’t easily overcome the rebound damping the tire’s casing’s contributes. As you might think, this ‘overdamped’ system has the side-benefit of not-bouncing, especially when run with tubes, which further increase compression and rebound damping. This is therefore a ‘stable’ system in terms of controlling unwanted vertical movement - bouncing. In order to achieve maximum rolling-speed at low pressures, casings need to be thin, which equates to fragile, particularly when exposed to rocks. In my region, my crew and I don’t ride our fat bikes in the summer, so we don’t benefit from biasing toward rock protection. Our most effective tire set-up will be the most supple option with large, open knobs for non-packed conditions. If our tires wind up bouncing at the low pressures we need, manipulating air pressure and volume won’t solve the problem.. We could, for example, add a foam tire-liner to reduce the tire’s air volume; this is equivalent to adding a volume spacer to a fork. This would create a steeper, more progressive spring rate, which wouldn’t be ‘matched’ by increasing rebound damping; we can’t adjust the tire’s casing. Sure, with a liner and more progressive spring rate, we’d be able to run a lower air pressure for grip while maintaining the same bottom-out resistance. This would be nice for folks riding fat bikes on rocky and rooty trails. But with a stiff tire, the benefit of low pressure with regard to rolling resistance is tied to casing suppleness. With a stiff tire the tire rolls slower and slower as pressure drops. With a supple tire, increasing spring rate with a tire liner will increase rebound speed for a given amount of tire compression. At 3 PSI, this could translate to faster rolling, but would definitely increase bounce force. With a road or gravel tire, this increase in spring rate won’t likely be felt, because tire ‘travel’ is relatively low.
Adding an inner-tube is the only way to increase rebound damping to a fat bike tire,. All this is to say that tires don’t afford tuneability akin to suspension, but they are subject to many of the same physics. For tires built to run tubeless, you can be fairly confident that there’s enough rubber in their casings to damp compression and rebound enough without a tube, and running one will push the tire well into ‘overdamped’ territory.

Tubeless Conversion FAIL
I tried to convert my bike’s stock wheels using Gorilla tape in combination with the existing rim strip. I won’t go into detail because it was ultimately a fail. I was able to get the front to hold air periodically, but not consistently over weeks of riding. I wound up putting the tube back in. I learned that these ‘windowed’ rims with exposed spoke nipples are the toughest and most annoying format to try to seal imaginable. There’s an option I’d have procured if Woven wheels were not my planned upgrade, which I’ve pointed a few friends to: Fatty Strippers.
I also learned that the ‘strap move’ works for a tough combo like the Colossos and 90mm rims. As you can see above, placing a strap around the tire’s circumference to aid in airing up works. This forces the tire’s beads outwards, which can be essential with wide rims like the 90mm units I have. I used a compressor (always take the valve core out when dealing with a tricky set-up), and they aired up easily when strapped. Without straps: no go.
Like I said, this conversion was ultimately a fail. I know others who’ve succeeded using various tapes, but they seem to all cost about the same as the Fatty Strippers, so I’d suggest going straight to that option if you can. Another option is to use one of the superlight tube options out there, which seem really expensive until you compare to the cost of various tape/strip solutions. For example, the REVOLOOP tube is so light and compliant that it should (is claimed to….) perform closer to tubeless than butyl tubes. For those who are not mechanically inclined and/or just don’t want to deal with tubeless for whatever reasons, these could be the best way to go. I’m going to get one to carry as my spare for next 2022-23, since I would rather spend the money than carry a 2LB tube around for years. Speaking of which, on my first ride local ride with friends I pinch-flatted. This is a distinct possibility early in our winter, while rocks are still exposed. Later in winter flatting becomes very unlikely.
Tubeless SUCCESS
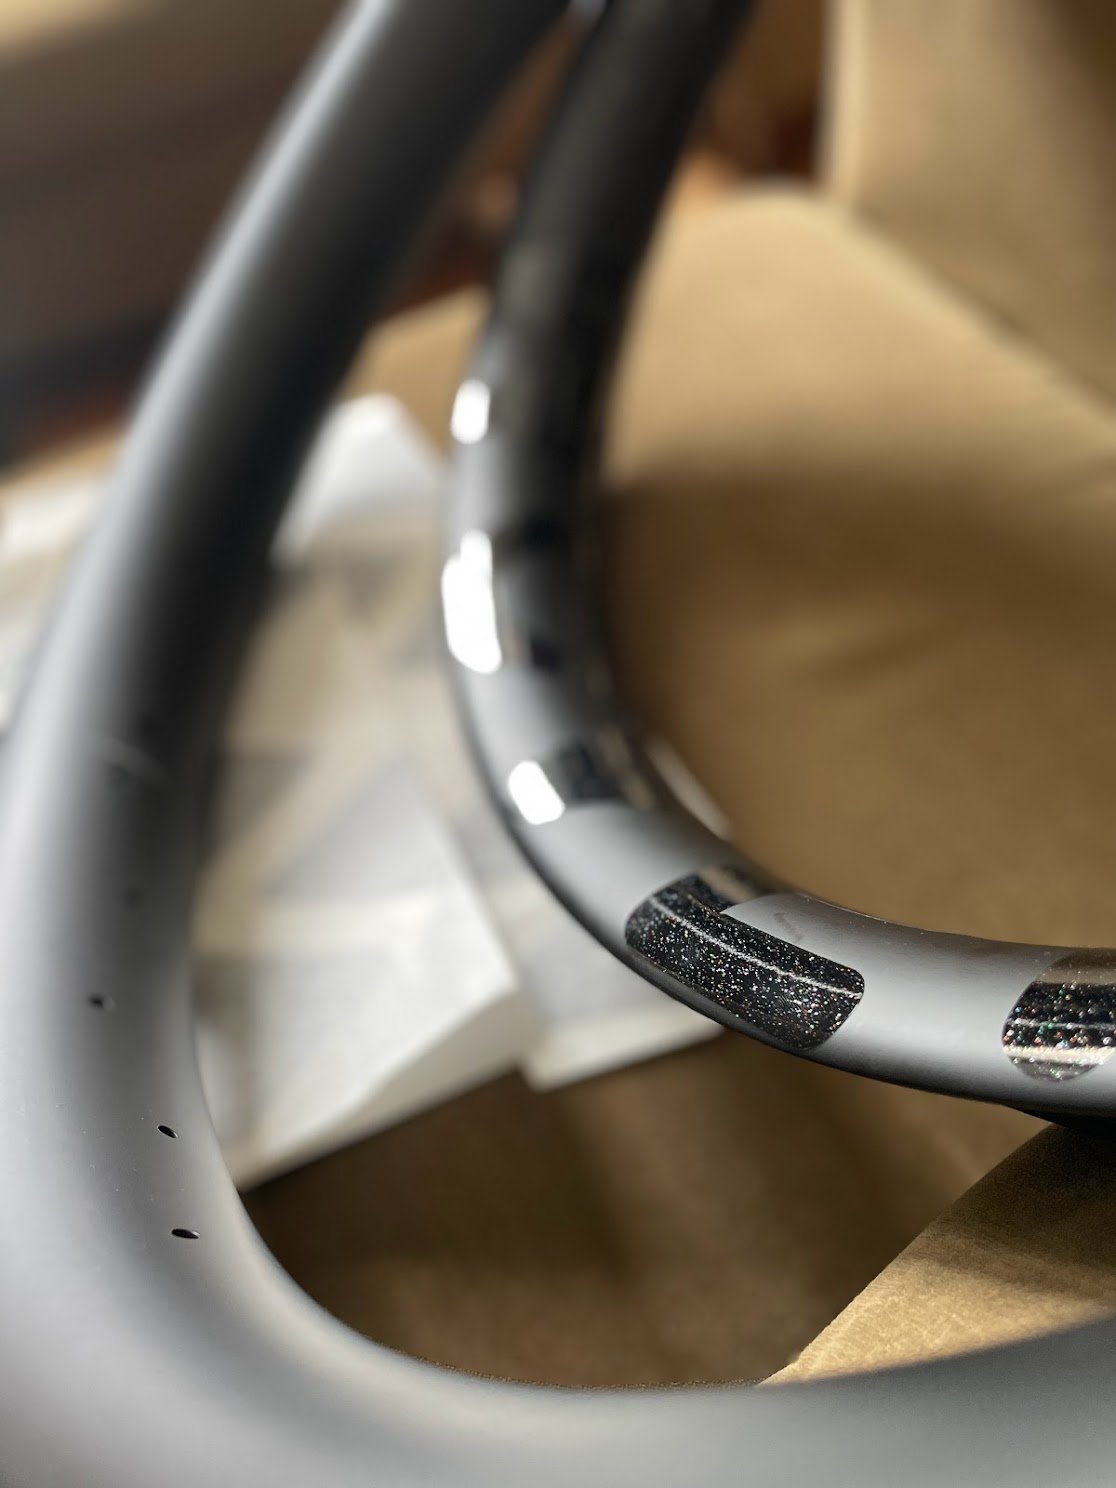
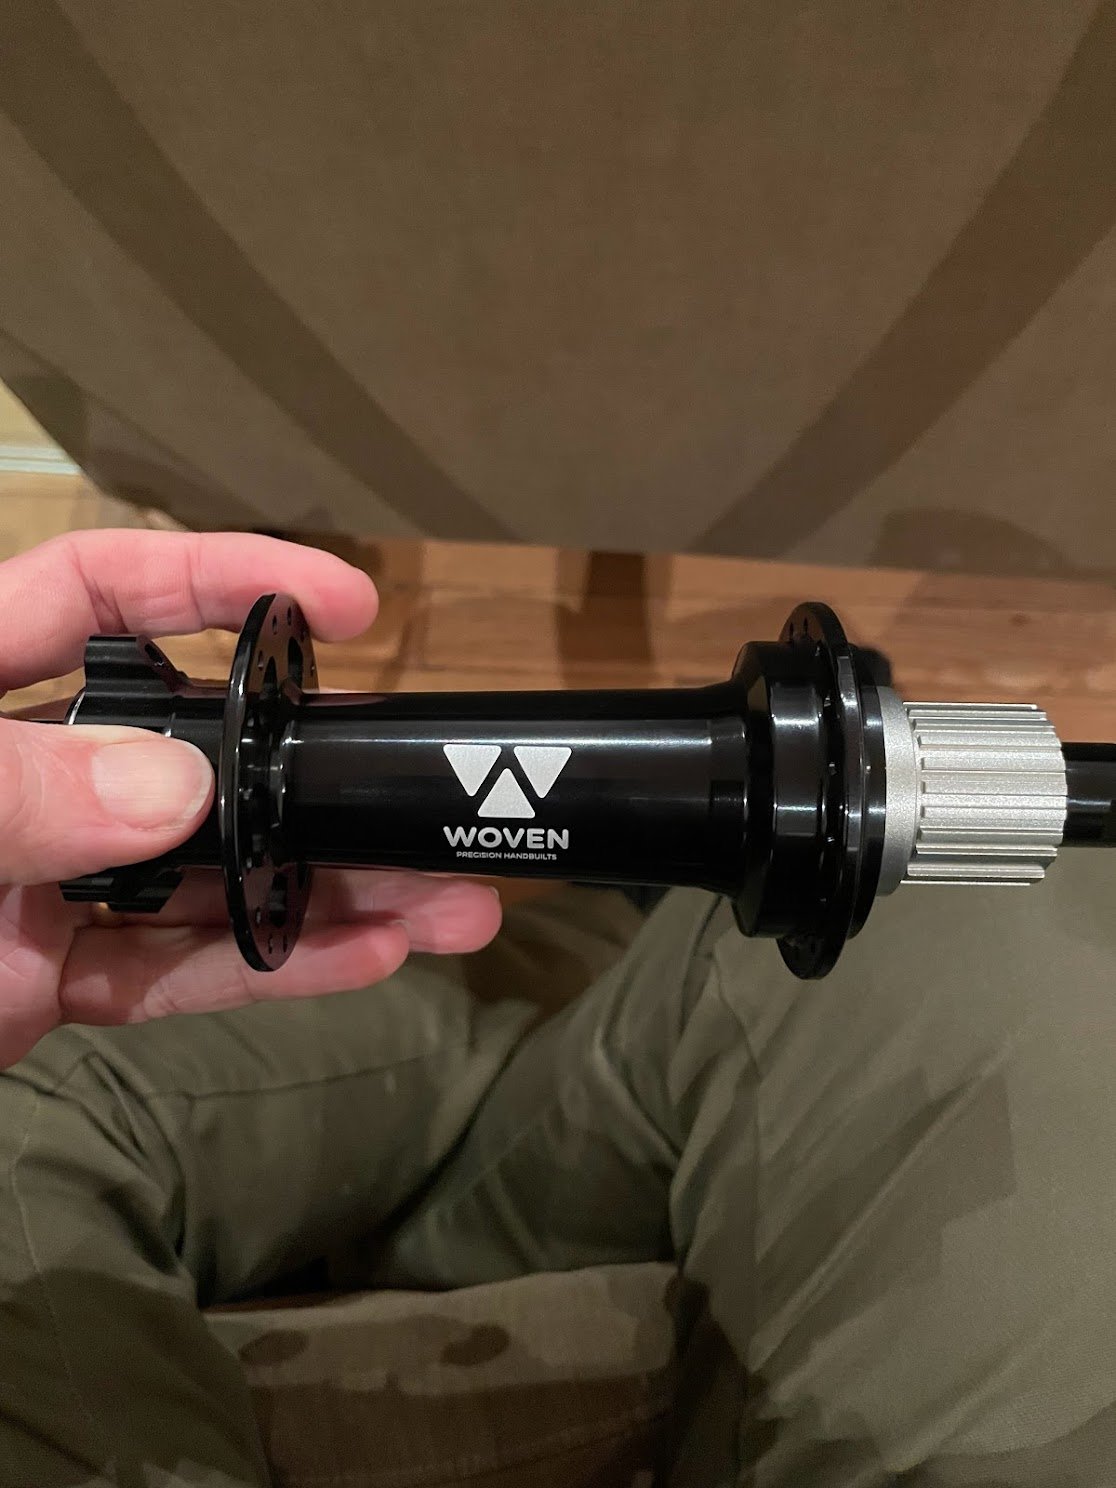
Once the parts arrived, I built my Woven wheels, and life got better real quick! The 75mm hookless rims were sealed with Woven tape and ready to mount tires to in short order. Thwap! Without using a strap, the first tire mounted with the valve core out. What about with valve core; will it go? Yep, easily! What a treat! Could I have mounted them with a floor pump? Maybe. I didn’t add sealant, ever. The tires sealed full without it, and I’ve ridden the bike more than 15 hours without air loss. The odds of taking a puncture small enough for sealant to actually work are slim. If i smash the tire and pinch it, no sealant will make the addition of a tube cleaner, and I won’t lose costly sealant. As my tires’ sidewalls degrade they might start to leak air, in which case I’ll add sealant. There’s so much rubber there I’m more likely to replace them with different tires first.
Dropping 15mm in rim width translated into a much more light-bulb shaped tire, versus the ‘square’ profile I had with the stock rims; and didn’t like. Measuring with calipers, I lost about 2-3mm width at the tire, depending on whether I was measuring tread or casing. The hookless format used to feel ‘wrong,’ but after using it on my 29er and 650b Woven wheels with nothing but excellent bead adhesion, I have zero qualms. The benefit of hookless beads is that the material is thicker and more resistant to impact damage.

Beyond Marginal Gains
Right off the bat, it’s not apples-to-apples to compare tire performance on two different rim widths. A 90mm rim, of whatever material, will make any tire more square than a 75mm rim. So we can expect less tread rolling on the ground at a ‘high’ pressure, and a faster rolling speed. Meaning, making the tire more round with the Woven rim made my tires roll faster at 10PSI on pavement; there is less knob contact. But I’m rarely at 10PSI, even when riding to the trails; I’m closer to 6-8PSI. Here, the tires are compressing more than a road tire, by far, and tubeless is reducing energy loss via hysteresis. But that benefit pales compared to the overall riding weight, which can be felt when changing power input. This is the ‘shocking’ improvement my Woven wheels deliver.
Speaking of shocking, how much weight did I drop when I swapped from the stock wheels with tubes and Eagle cassette to the Wovens and SLX cassette, tubeless.
I went from 35.8 LBS to 29.8 LBS!
That’s massive, and the cassette accounted for less than 100g of savings. The weight difference included two layers of Gorilla tape I’d added to my stock rims. Conservatively, we’re looking at 5.5LBS saved from the stock wheelset. The total bike weight also includes XTR pedals, two cages, and my RoadRunner handlebar bag.
Previous to changing wheels, and irrespective of whether I had a tubes in both wheels or one, increasing power input at the pedals never made the bike feel like it surged forward. To increase speed, I needed seconds of increased power input; it was a slow-build dynamic. On the flip side, when handling the bike on technical trails, the wheels carried a lot of inertia, which I had to fight hard when things went squirrelly. Sometimes their inertia was helpful, for sure, but it was problematic more often.
The responsiveness I gained felt super on the road and rail-trail, but in these contexts, the gains of light-weight and low rolling resistance will always be about degrees of benefit, not binary pass / fail outcomes. Meaning, yeah, we’ll go faster for the power we put in, but there’s nothing more to it than that. Off-road, on technical singletrack, this increased transfer of leg power into forward propulsion equates to the difference between making it up climbs or not, crashing or not. This comes down to the nature of riding on snow, which is the most finesse-heavy off-road discipline I can think of. More power is not enough to ride fat bikes well, because power is lost in wheel-spin where traction is low. It’s much more a game of infusing short bursts of power while going in a straight line and while the grade affords good grip. You have to build momentum in very short phases, and ease off power to maintain momentum as grip drops to near-zero. Racing cyclocross in mud is very similar.
I hope you can see why lags in power transmission matter so much on tough terrain. Being able to benefit from sharp power bursts translates into a very different aerobic effort, because you can actually do shorter power phases effectively, versus longer ones to wind up speed. Often, there’s not even enough trail to work with to generate that speed, so it’s a losing battle. As you throw everything you have at the bike to try to keep pace with friends, you wear down, fatigue, and make more mistakes. The Woven’s reduced inertia definitely makes it easier to work the bike when things get wild, not to mention a lot easier to push up climbs I don’t make.
I can’t think of a use-case where tubeless Woven wheels are more worthy of investment than on a fat bike for a rider who rides technical trails. The more technical the riding is, the more benefit the wheels will provide. And as a wonderful additional benefit, they transform a bike I’d be loathe to ride far on pavement to one I don’t really mind doing so on. My only real beef is that I’m wearing my rear tire down as I do so. I did an 80km ride recently that was more than half on pavement, and it was more boring than annoying.
Conclusions
Let me end where I began: with my ‘research question:
Can an aluminum fat bike actually feel good enough to want to ride it a lot.
I didn’t want to have to resort to riding a carbon fiber frame to LOVE fat biking. If that’s what it takes, well, that’s kind of sad. Because that’s not what it takes for MTBs. I WANT awesome fat bike experiences to be possible for folks on metal bikes, because they are cheaper than carbon (usually).
I’m stoked to write YES, an aluminum fat bike CAN feel good enough to want to ride it a lot. And I’ll go further: it can feel good enough to LOVE riding it. I had so much fun riding my Minus that I was still smiling on Monday after each weekend riding. Riding amazing trails with friends every weekend made it one of the best winters I can remember, even though work had never been more stressful, and we were still slogging through the pandemic.
There’s a threshold underpinning what I’m saying here. I didn’t cross this threshold until I upgraded to Woven carbon wheels. To that point, the Minus did not do what I wanted it to do enough of the time. It was generally good on descents, which boils down to its geometry and the dropper post allowing me to put my body where I need to be. But through transitions the bike did not react enough to my input enough, which dissuaded me from manifesting the best form of myself as a bike rider. Dynamically. It was more of a ‘grinding’ style that matched the bike’s characteristics, which essentially shuts down the sort of tactical engagement I love about riding bikes.
‘Tactical’ here means reading the terrain ahead and phasing effort in a very deliberate way to gain, preserve, and dissipate momentum. I’m talking about the magic of flowing through a trail, versus imposing your will upon it. The Minus, in stock form, requires a heavy hand - all the power available, almost all the time - to move through technical singletrack at a decent pace. My upgraded Minus presents other options, judicious use of power, working the puzzle. The riding becomes a game, where outcomes are more about moves made, gambles taken, versus ‘you’re either strong and fit enough or you’re not.’
This the the crux of the matter, and the question of what makes a bike truly ‘good.’ It’s about how we feel, and how we think, when we ride. A bike that makes us question our ability and value every time we ride it in the environment its built for is a shit bike. A bike that makes us feel like we’re playing, and our physical fitness underpins the game, but isn’t the game itself is a great bike.
There are different ways to realize great bikes, and sometimes what’s great might not actually be the fastest or most efficient. It depends on what we bring to the ride, and our expectations for how a bike should behave as part of our bike-body schema.
I changed parts on my Minus at each contact point: saddle and post, bars, grips. With the saddle and grips, I simply carried over what I ride in the summer on my MTB. These are personal preference items, mostly, though the grips contribute to a case-specific improvement: heat retention. My handlebar change dropped a bunch of weight, improved hand warmth, and improved fatigue resistance at least a little.
My drivetrain changes wound up being pretty weird in the end; I’ve wound up with a bit of a frankenbike. In terms of value, the Kolossos cage and pulleys might have dropped a little weight, look amazing, and work great, but otherwise don’t really impact the bike’s fun-factor. Where Kogel’s pulleys tend to really make themselves conspicuous, I find, is in their resistance to damage from the harsh conditions I ride in. I wash my bike fully after every fat bike ride, and probably 30% of the other rides I do in a year, and they hold up incredibly well. Components that endure brutal riding, and don’t cost me time in the basement doing repairs and replacements are worth a lot overall. Nothing sucks the fun out of sport like incessant maintenance and equipment failure.
Braking improved slightly with Kogel’s pads, but again, this is a small thing, a matter of degree.
In the end, the bike’s transformation is all down to the wheels, and would not have been realized by merely converting the stock wheels to tubeless. The combination of stiff wheel structure, firm tire retention - did I mention I didn’t have to use a drop of sealant in the tires? - quick and consistent drive engagement, and low wheel-system weight create handling and propulsion dynamics that feel nimble, precise, and in harmony with my riding style.

What now?
If you have a fat bike you’re not quite happy with, and you’re riding on tubes, this is the first thing to either ditch or replace with a super-light option. Heavy, stiff tires will guarantee your bike won’t be as fun as it can be, and will dissuade you from riding the low pressures for soft conditions. By priority, I’d suggest investing in the best, most supple tires you can afford, ideally tubeless. That’s step one. After that, carbon wheels like Wovens will take you up to the next level of ride quality. These changes will make more of a difference to your bike’s performance than anything else, except where warmth is involved.
On this note, carbon bars are a priority. There’s no better way to help your hands stay warm, short of using pogies, which are polarizing.
I didn’t really get into it above, but I do highly recommend using a dropper post to unlock your fat bike’s potential. Without one, you’ll be limited in how much front brake you can use on steep descents. Descending on while sitting on your top-tube might work, but it also creates ruts that cause other riders problems (oh, the irony… I face planted into a tree a couple days after writing this, and broke my nose. The crash occurred because of a deep rut).
Mo Mods
Tips aside, I have a few more mods in mind to bring my Minus’s performance up to the level l want it to be for its second winter. Perhaps even before then, an oval Absolute Black ring in 30t will arrive, which ought to improve climbing traction. I’m a total oval convert, - and ambassador - so I look forward to this performance bump, which will also bring more weight savings against the stock steep ring.
My priority purchase will be a pair of tires with more aggressive tread. Options are relatively limited in the 4.5” size at the moment for 27.5” wheels, but since these tires aren’t even actually that wide, options labeled 4.2” or 4.3” might end up being the same width, which is fine. I’d love a big, compliant, and directional tire like the Surly Bud, but it’s only made in 26” x 4.8”. I’ll see what comes out, and what’s actually available!
I’ve decided that it’ll be worthwhile to share as many components as possible between my Trek Stache hardtail and Minus. In my mind, this is a no-brainer, since I’ve confirmed I’ll focus my winter outdoor riding on fat biking from now on. I’d rather share the highest quality and best looking components I can between two bikes than run each bike with lesser components. There’s zero overlap between riding seasons and no reason to have both bikes rideable at the same time. I can share pedals, seatpost, saddle, bar, stem, cassette, rear derailleur, shifter, and brakes between the two bikes. I’ll move my SRAM Trail XO brakes with carbon lever-blades over from my Trek for next winter, unless anyone reading is associated with a brake manufacturer that makes a set-up suitable for summer and winter use - one brake to slay them all. Let me know!
I’ll port over my XTR shifter and rear derailleur. The dual-release of the XTR shifter is something I miss with the SRAM NX, and the derailleur will accept Kogel’s Kolossos cage. What colour scheme should I rock to jive with the two bikes? It’s nice to confront such a ‘tough question.’ I’ll run a 12-speed Shimano chain to bump shift precision up to optimal.
The bike’s NX cranks will remain until/unless another option arises that is somehow inexpensive, light, and strong. I’ll do another round of Kogel upgrades that ought to really amp up the bike’s aesthetic appeal, on top of moving to their SRAM DUB bottom bracket. Their titanium rotor bolts will bring some more flair to my wheels, and their preload adjuster for the DUB crank will replace plastic with aluminum, and infuse bling into the bottom-bracket area. More custom options!
With these changes, the bike will wind up being almost completely upgraded. It’ll be interesting to see where its overall weight lands, and how it performs with a full-Shimano drivetrain and more aggressive tires.
Thank you to Benoit Simard, Espresso Sports, for being a great friend, ride guide, first-aider, and bike seller! Thank you to Kogel, Absolute Black, Woven Precision Handbuilts, Castelli Cycling, and Lake Cycling for supporting my cycling adventures and experiments!
Thanks for reading! Please don’t hesitate to comment and pose questions below!